

EventTiz: Appwrite and Hashnode Hackathon Submission
In this article, I'll walk you through how I built an event ticketing application with Next.js and Appwrite Cloud.


Table of contents
- Team Details
- Project Description
- Tech Stack
- Challenges I Faced
- Public Code Repo
- Demo Link
- The UI Design process
- What is Appwrite Cloud?
- How to add Appwrite to a Next.js app
- Authenticating users with Appwrite Cloud
- Communicating with Appwrite Cloud: Interacting with the database and storage
- Creating and sending event tickets to attendees
- Conclusion
Recently, I built an event ticketing application using Next.js and Firebase. Then, after learning about Appwrite Cloud and the ongoing hackathon on Hashnode. I thought to myself, why not give it a shot? 😁
Sure, I did, and I found Appwrite Cloud to be very user-friendly. Excellent documentation, kudos to the team. 🫡
Team Details
Project Description
EventTiz is an event ticketing application that does the following:
authenticates users via Email and Password with Appwrite,
allows users to create events and generate a registration link to share with friends or the public.
when someone registers via your invite link, they receive the event ticket in their email, including a passcode which you can use to verify their event ticket from your dashboard.
The application also allows you as a user to view the number of people who registered for your event, validate an attendee's ticket via the passcode they receive, and also disable the registration link when you have enough attendees. You can also delete an event after it has occurred.
Tech Stack
Challenges I Faced
Adding the event flier (image) uploaded by a user to the event document
I overcame this challenge by uploading the image first, then adding the flier's URL generated to the event document before saving it to the database.
Deleting the event flier from the Storage and its document when a user deletes an event.
To overcome this, I had to get the event document using its ID, and then retrieve the flier's ID from the flier_URL attribute saved on the event document. Therefore, enabling me to delete the image from the Appwrite Storage using its ID and the document from the database collection.
The function below returns the flier's ID from its URL.
const extractIdFromUrl = (url) => {
    const regex = /files\/([^/]+)\//;
    const match = url.match(regex);
    return match ? match[1] : null;
};
const fileURL = "https://cloud.appwrite.io/v1/storage/buckets/646dd497bad89c9da421/files/647c88e22f955ef8b399/view?project=646dd3f93a254e96fc2d&mode=admin"
console.log(extractIdFromUrl(fileURL)) //👉🏻 647c88e22f955ef8b399
Public Code Repo
Demo Link
In this article, I'll walk you through how I built an event ticketing application with Next.js and Appwrite Cloud. If this is your first time using Appwrite, don't worry, you are in good hands.
Upon completion, you'll be able to create advanced web applications using some of the features provided by Appwrite, like authentication, database, and file storage.
💡 PS: This tutorial assumes you have a basic knowledge of React or Next.js
The UI Design process
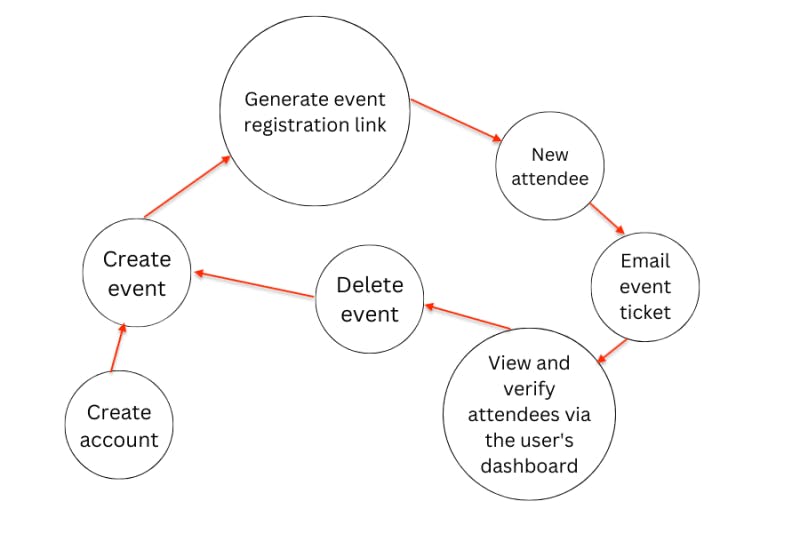
Here, I'll walk you through creating the required pages for the web application.
First of all, you need a homepage for the application. The home page should have a link where new users can create an account and another for existing users to log into their accounts.

Next, create the sign-in and sign-up page. In this article, I'll use the Email and Password authentication method.

After successful login, users can create new events, view existing events, and log out of the application on a single page, called the dashboard page.

Next, you need to allow users to view the attendees for each event, disable registration, validate the user's ticket at the venue, and delete an event.
Therefore, you need to create a route for each event. You may adapt my method, where I made each event clickable redirecting users to another page containing every detail of the particular event.
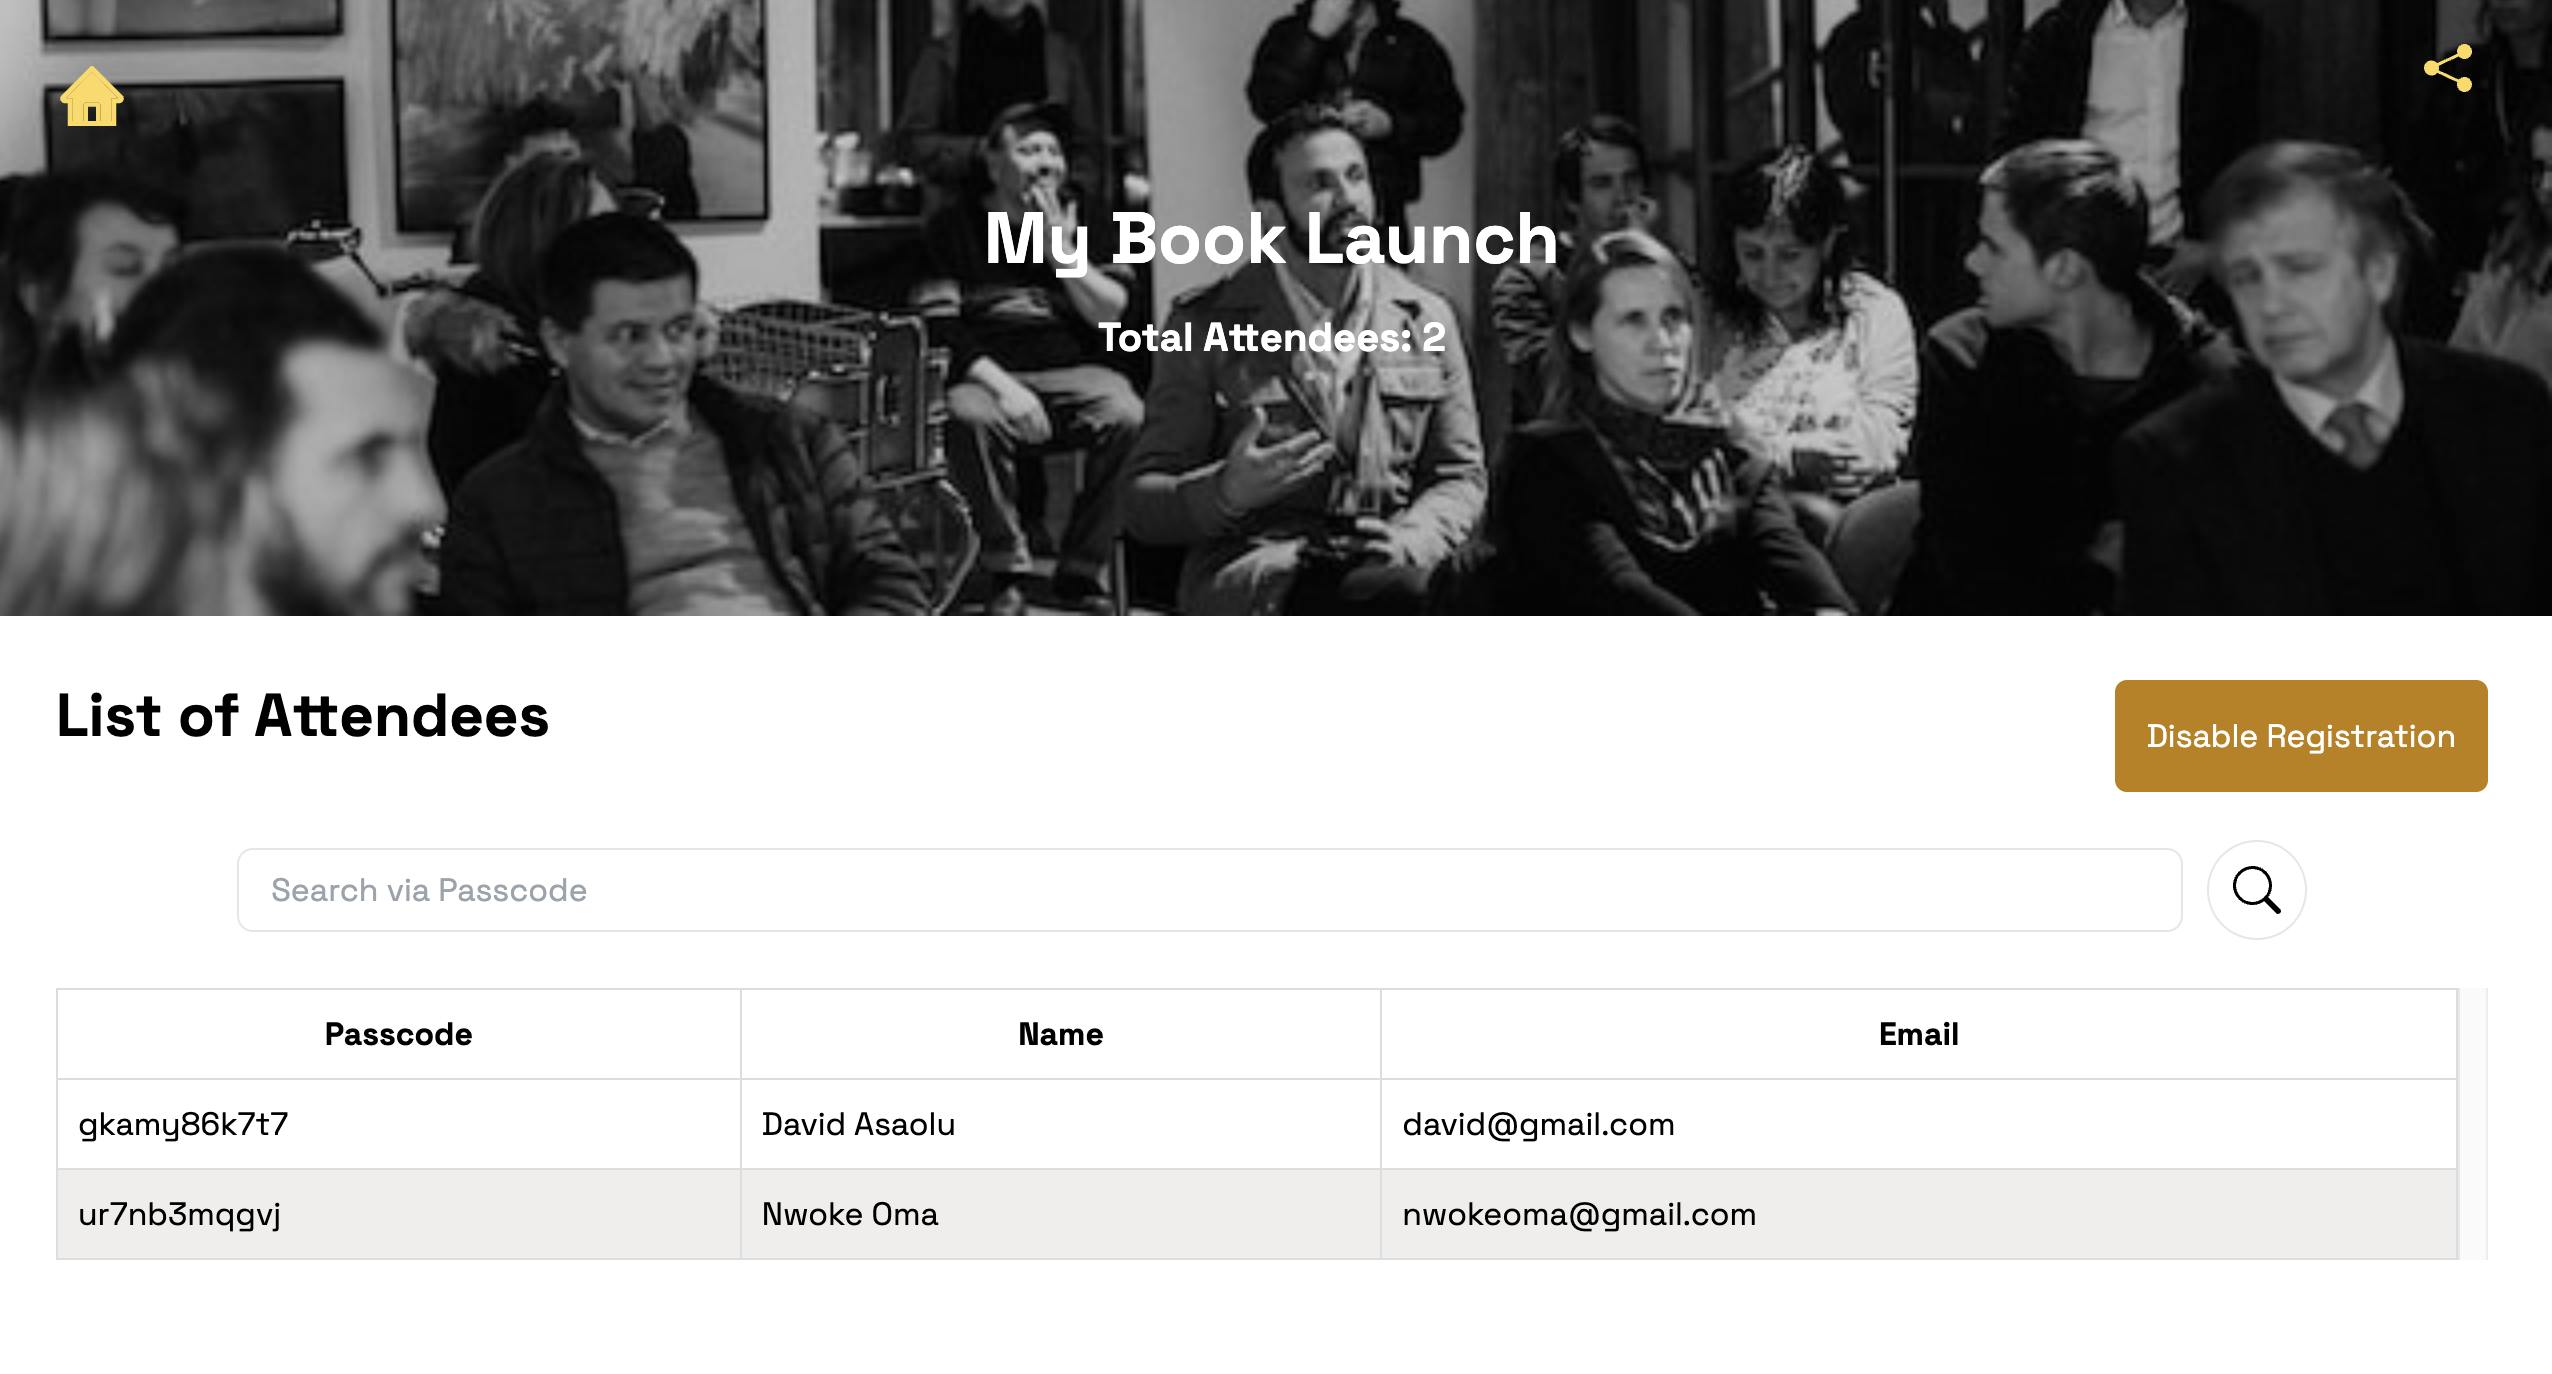
From the image above, users can disable the registration link for the event and view and validate the attendees' list.
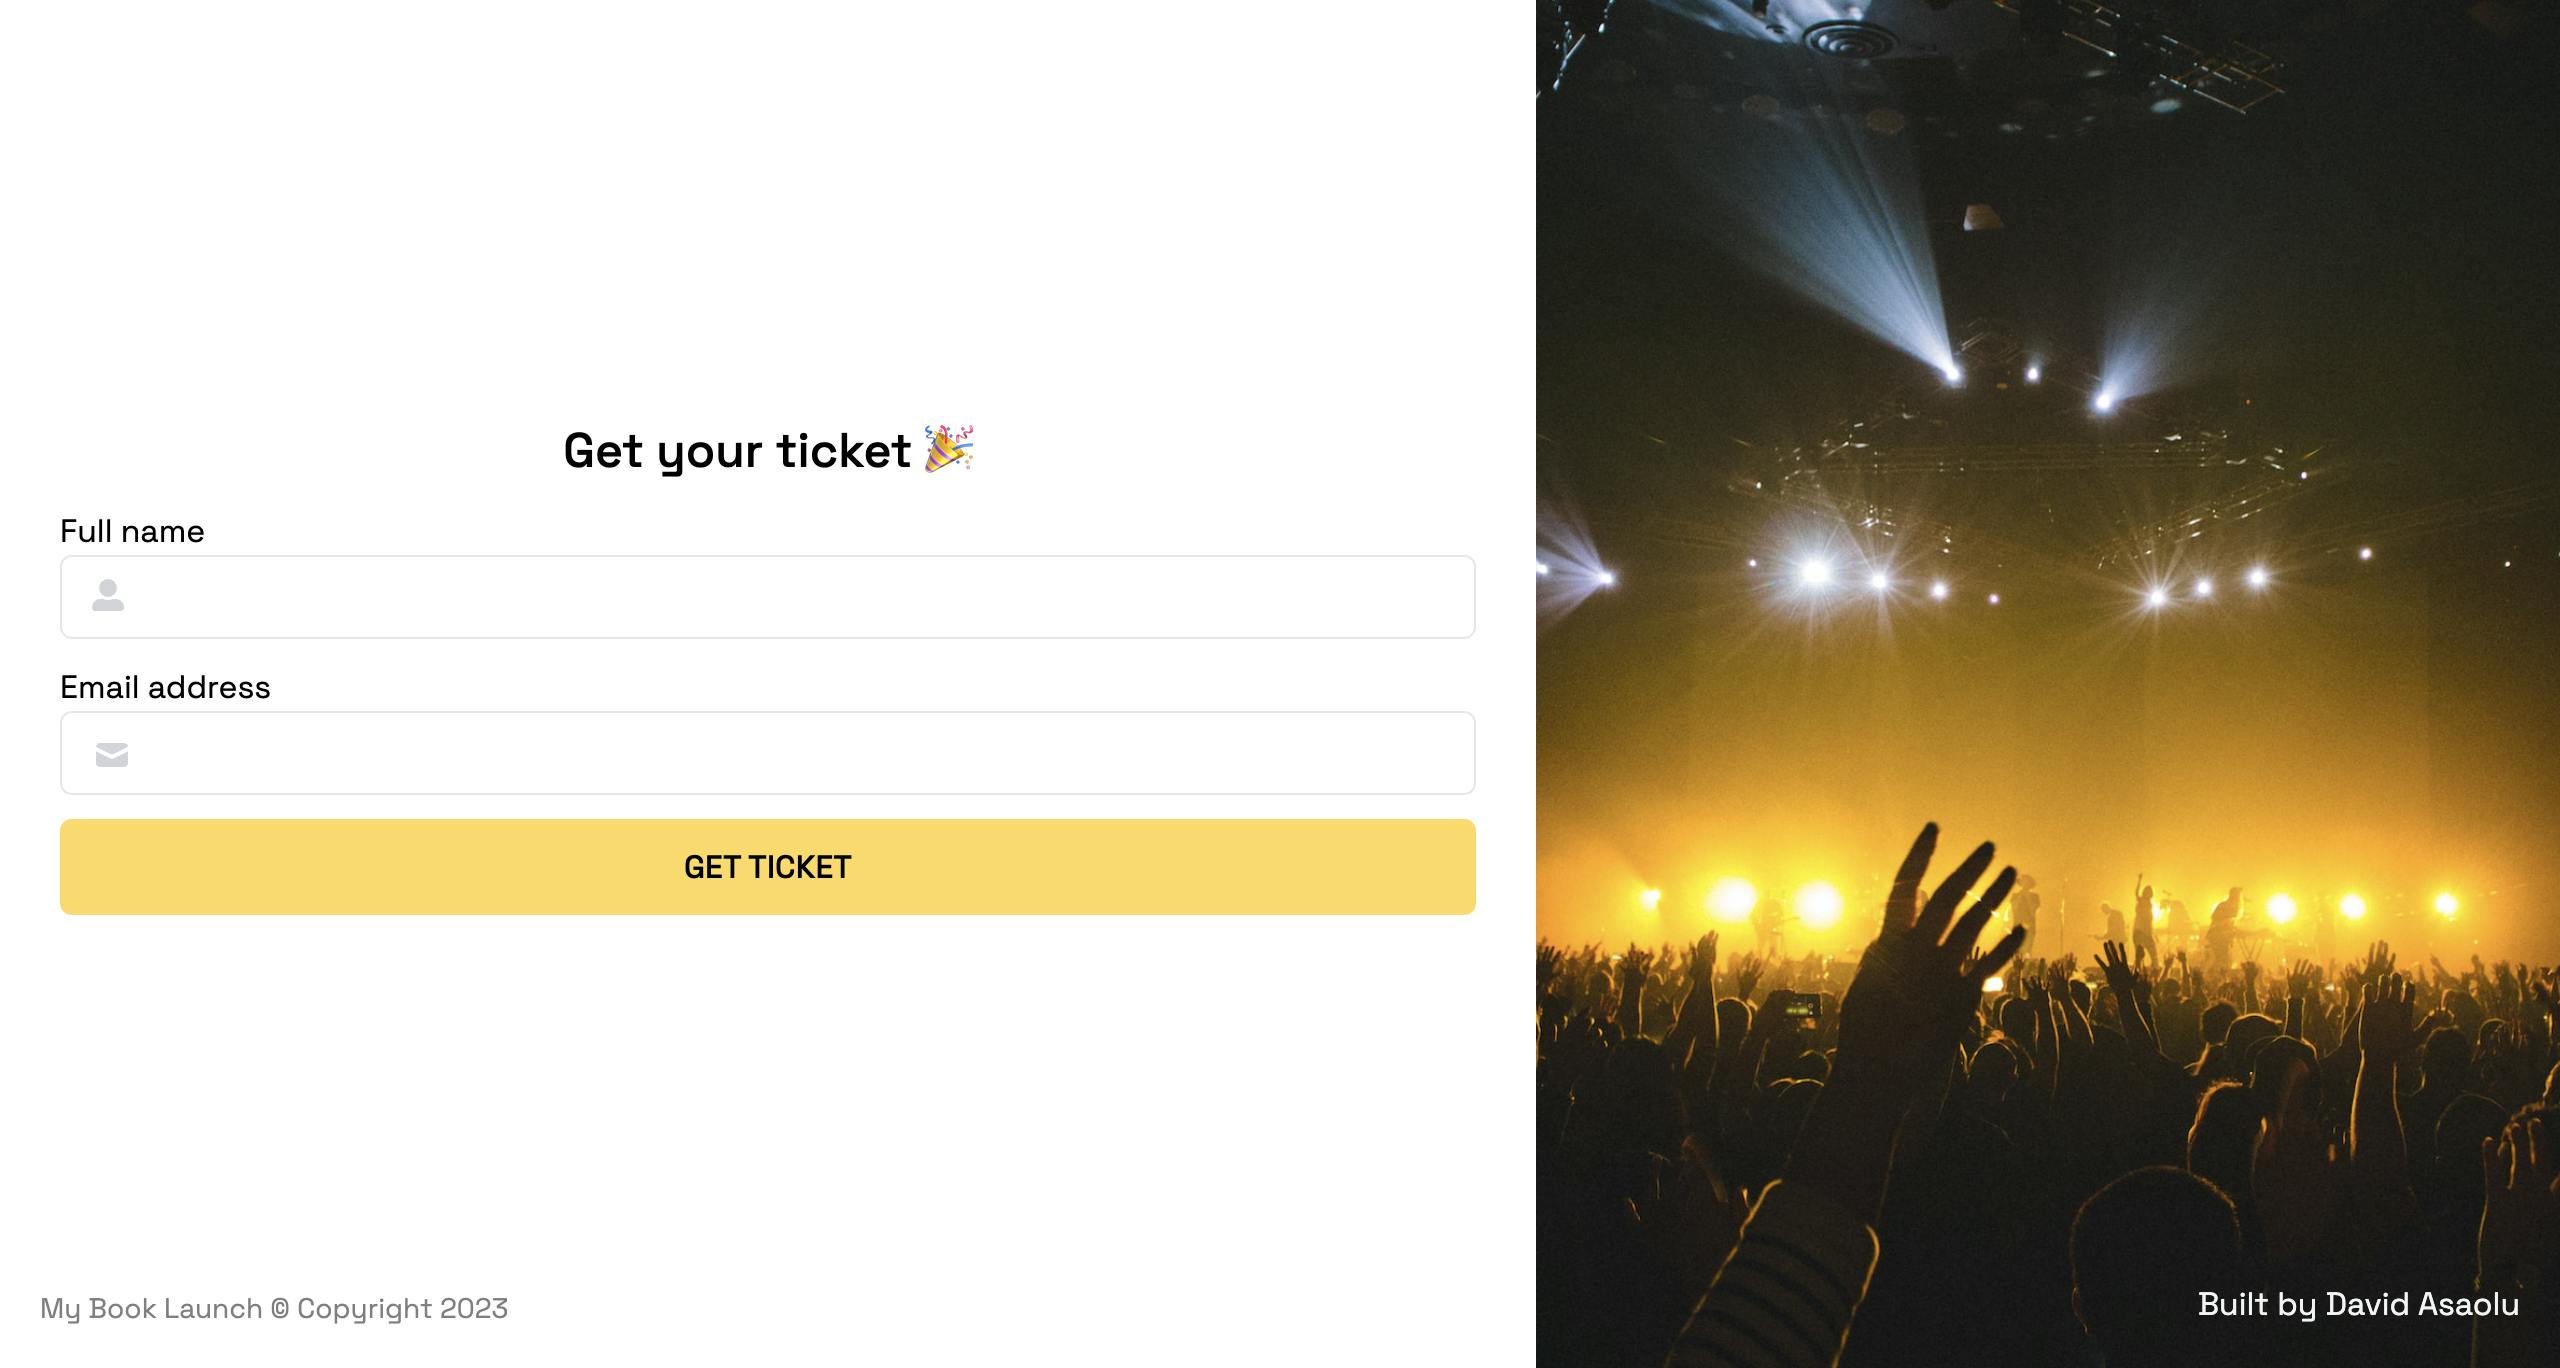
Finally, create the event registration page. Before showing this page to a visitor, you need to check if the event registration link has not been disabled.

After validation, users should supply their name and email, be added to the attendees' list, and receive an email containing the event details.
Since you've learnt how to build the pages of the application. Let's code.💪🏾
In the upcoming sections, you'll learn how to use the various features provided by Appwrite.
What is Appwrite Cloud?
Appwrite is a powerful open-source backend platform that enables you to create secured and scalable (web and mobile) applications. With Appwrite, you don't need to worry about the backend resources of your application because with Appwrite, you - "Build Fast. Scale Big. All in One Place."
Instead of setting up your backend server on your computer, Appwrite Cloud enables you to focus on developing your applications; while, it manages crucial backend functionalities such as user authentication, database management, file storage, and more.
How to add Appwrite to a Next.js app
To add Appwrite to a Next.js app, follow the steps below:
First of all, create a Next.js project by running the code below.
npx create-next-app event-ticketing-app
Visit Appwrite's website and create a new account.
Create a new organisation and project. Each project contains all the resources you need to build a fully functional application with Appwrite.
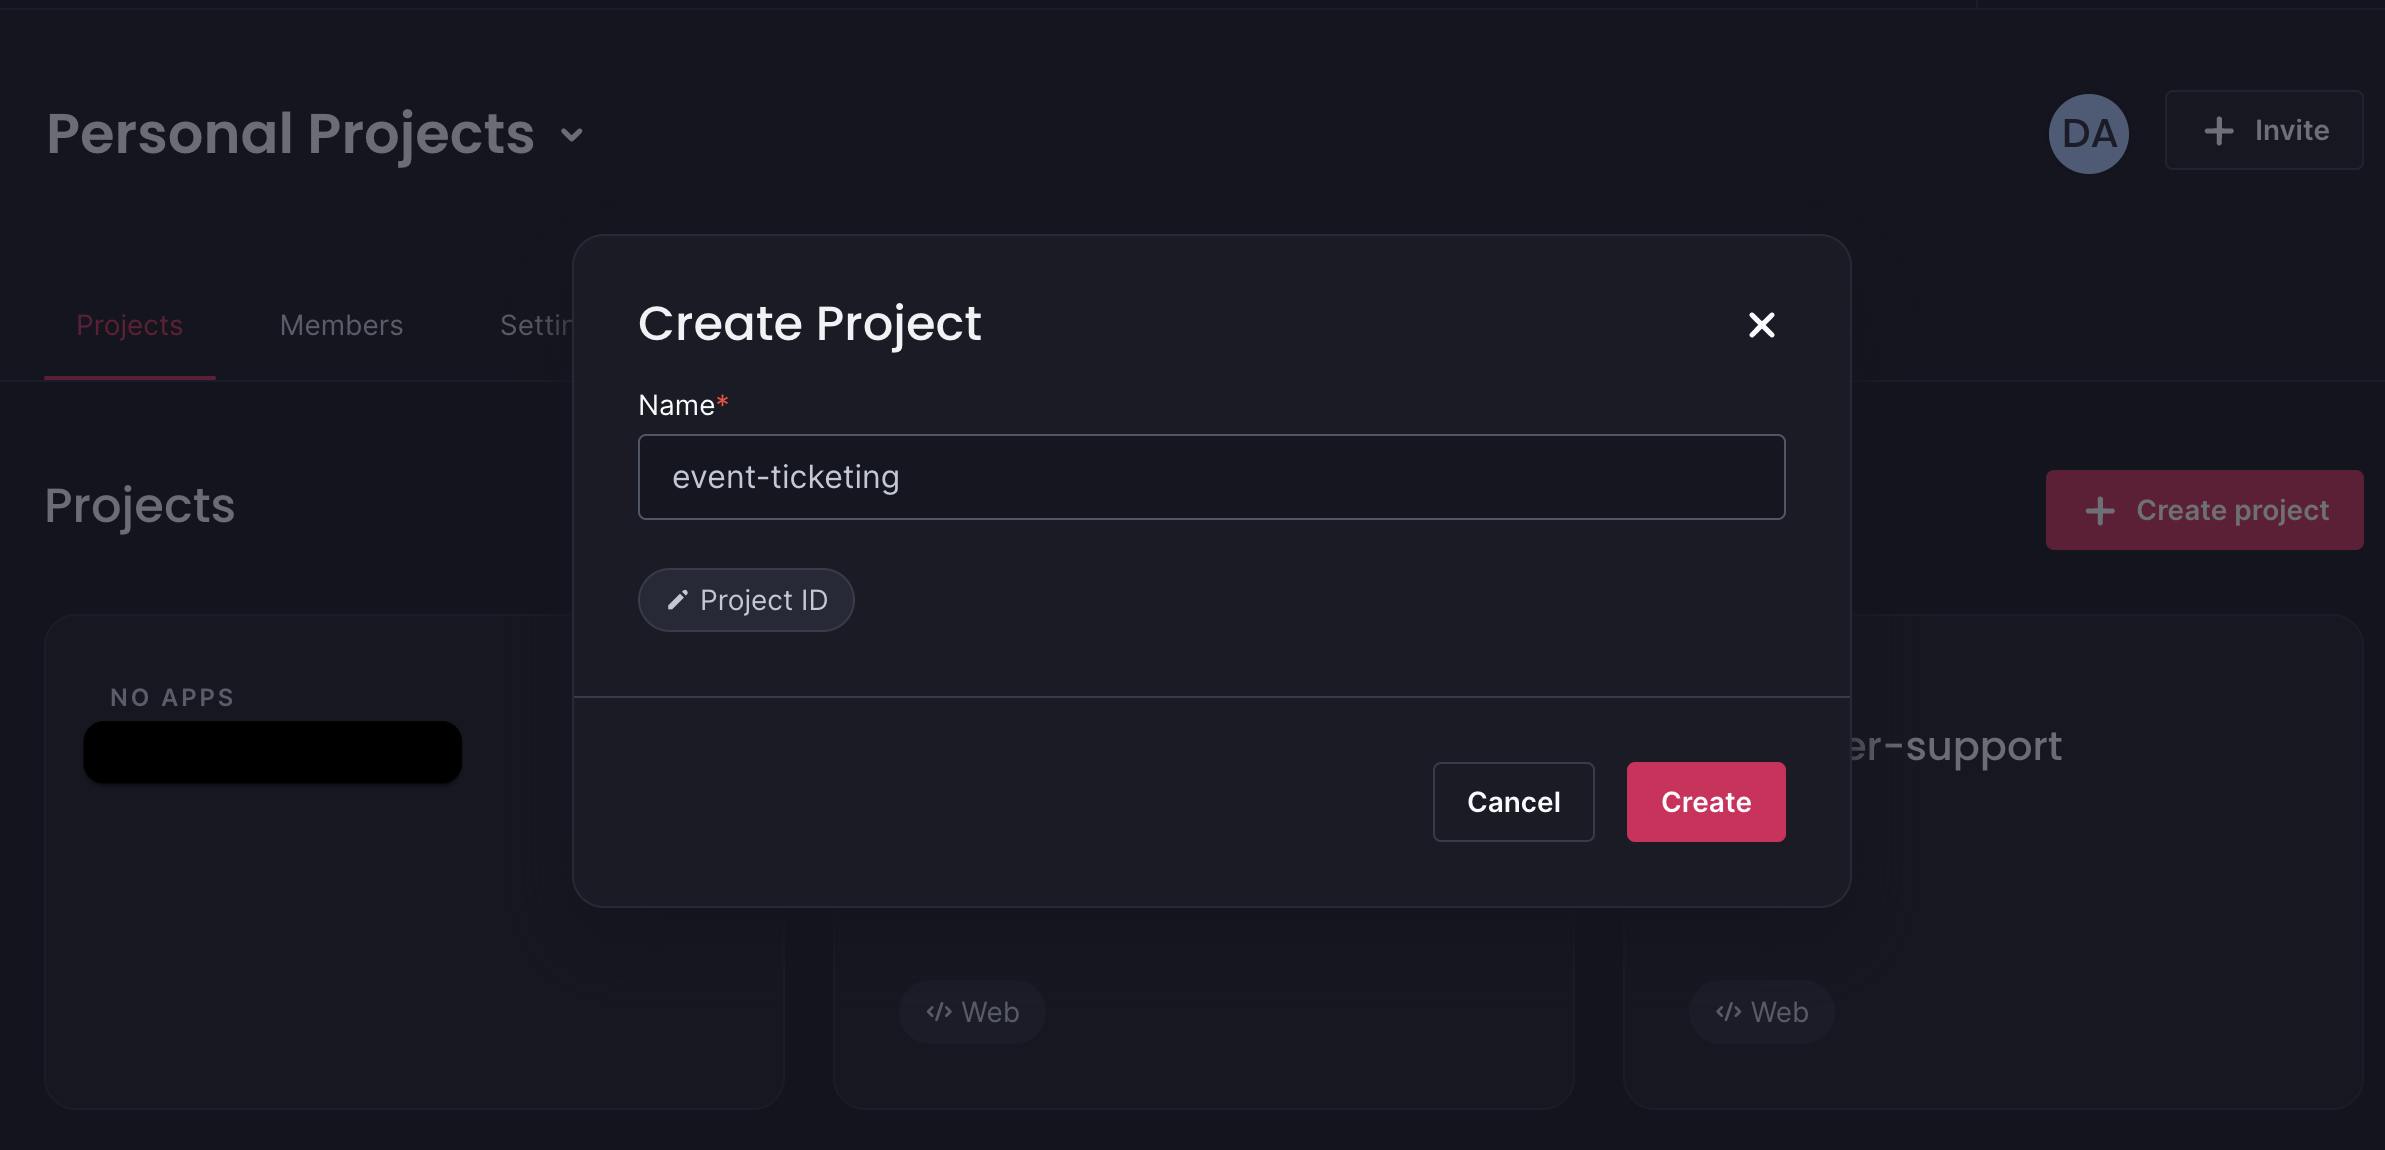
Next, you need to choose where and how you want to use Appwrite, either as a web or mobile SDK or you need to integrate it with your (existing) server.
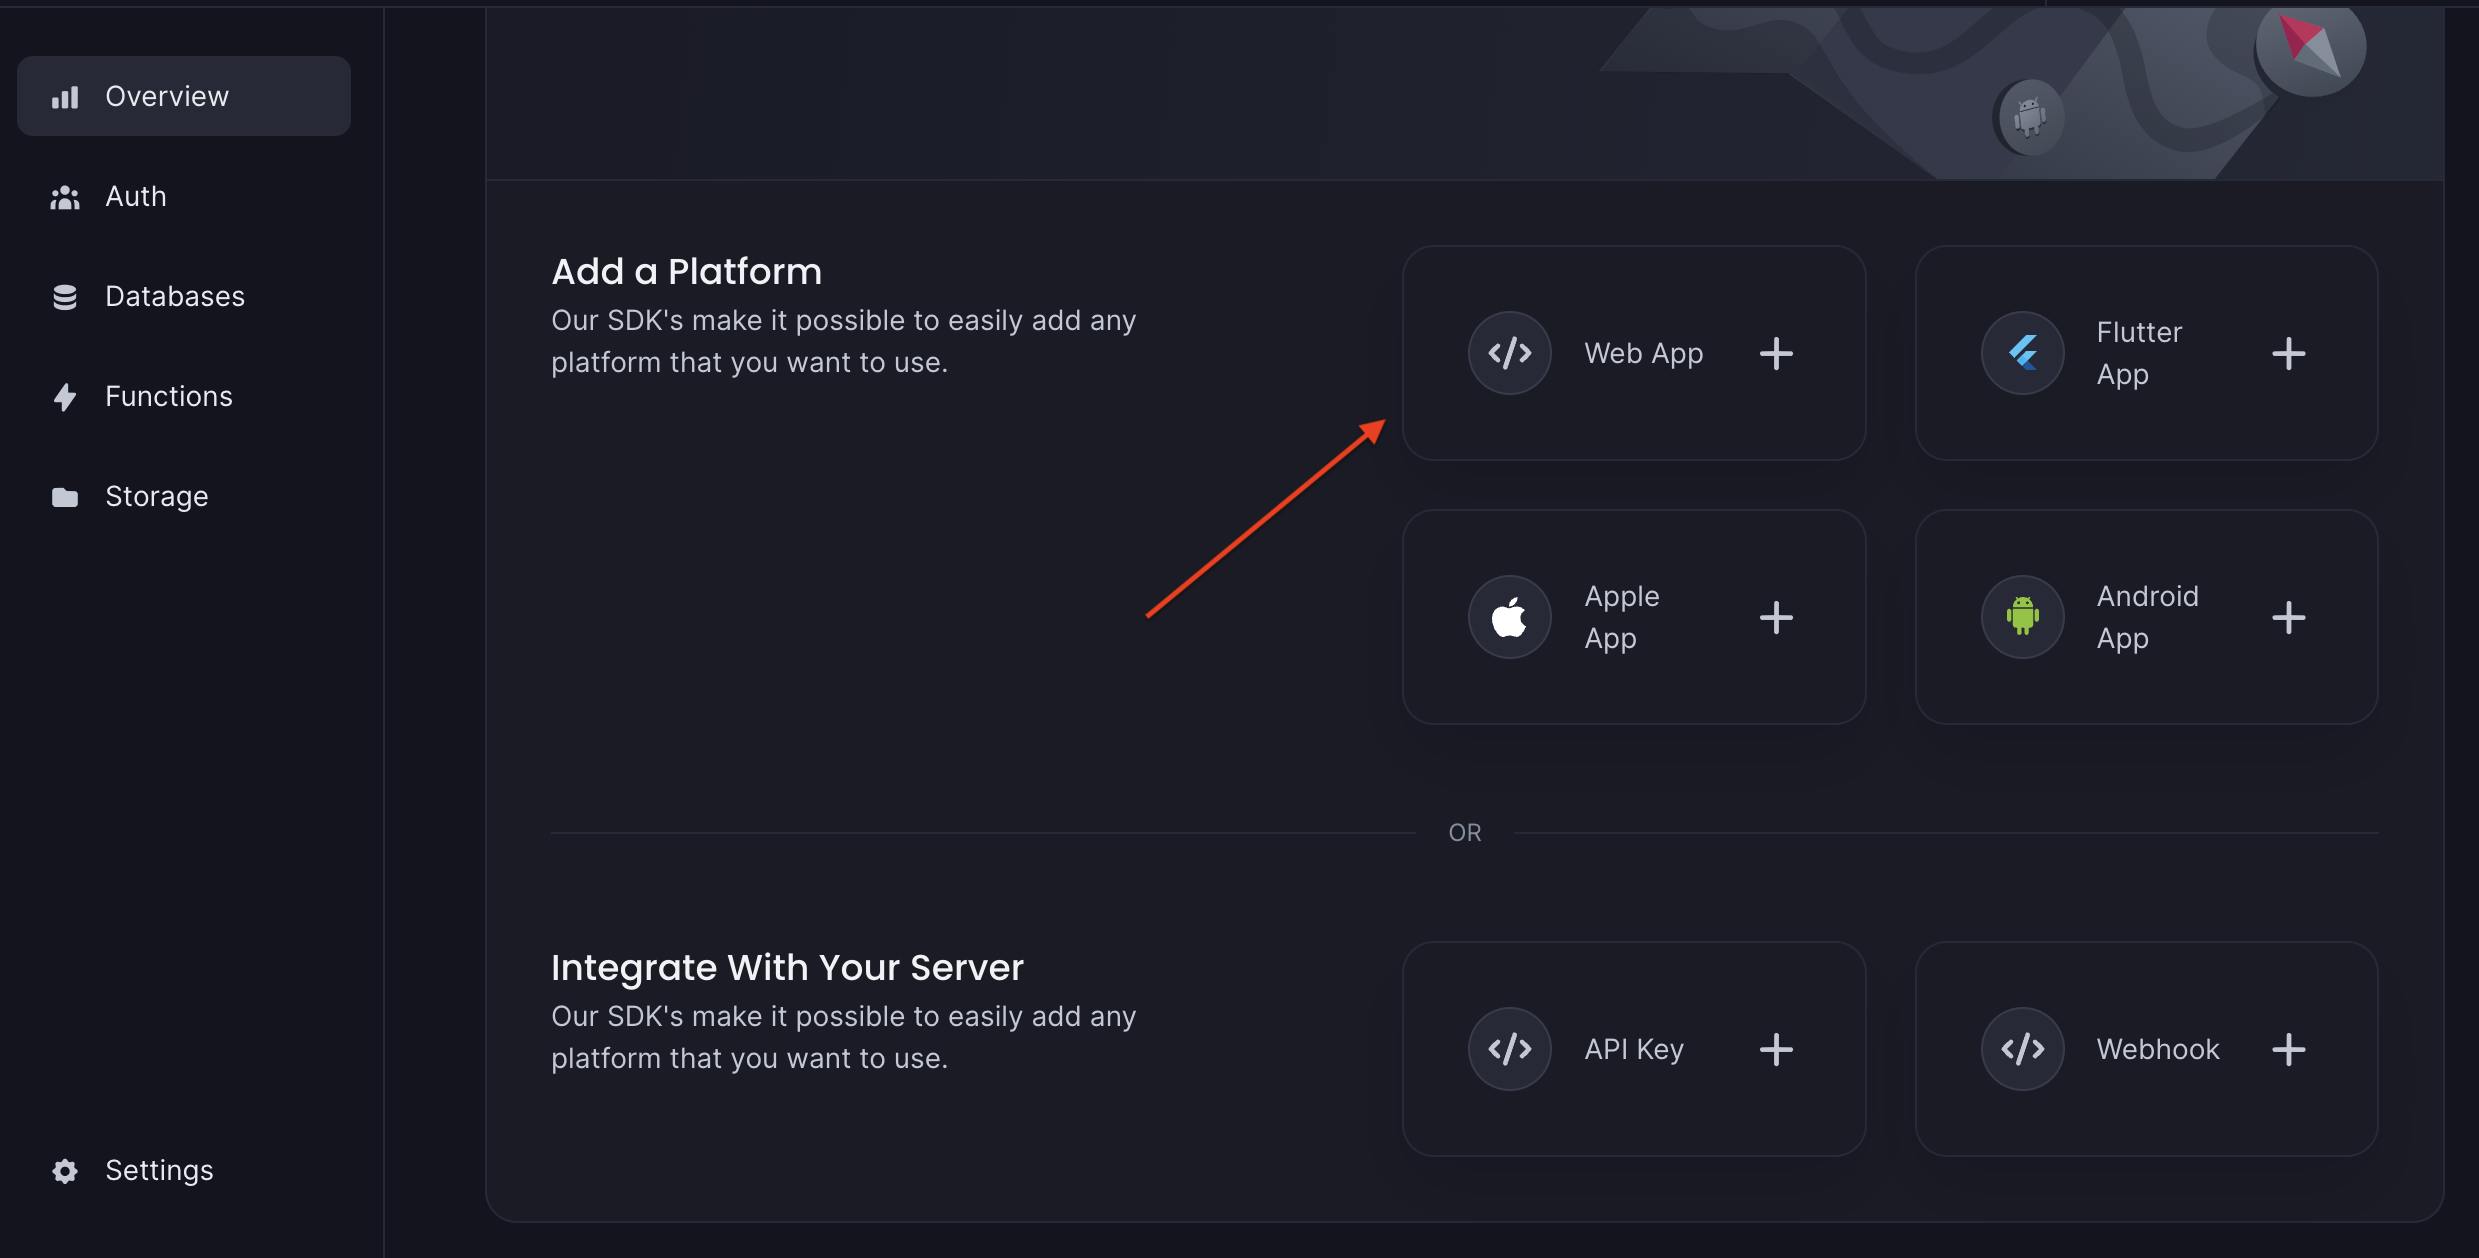
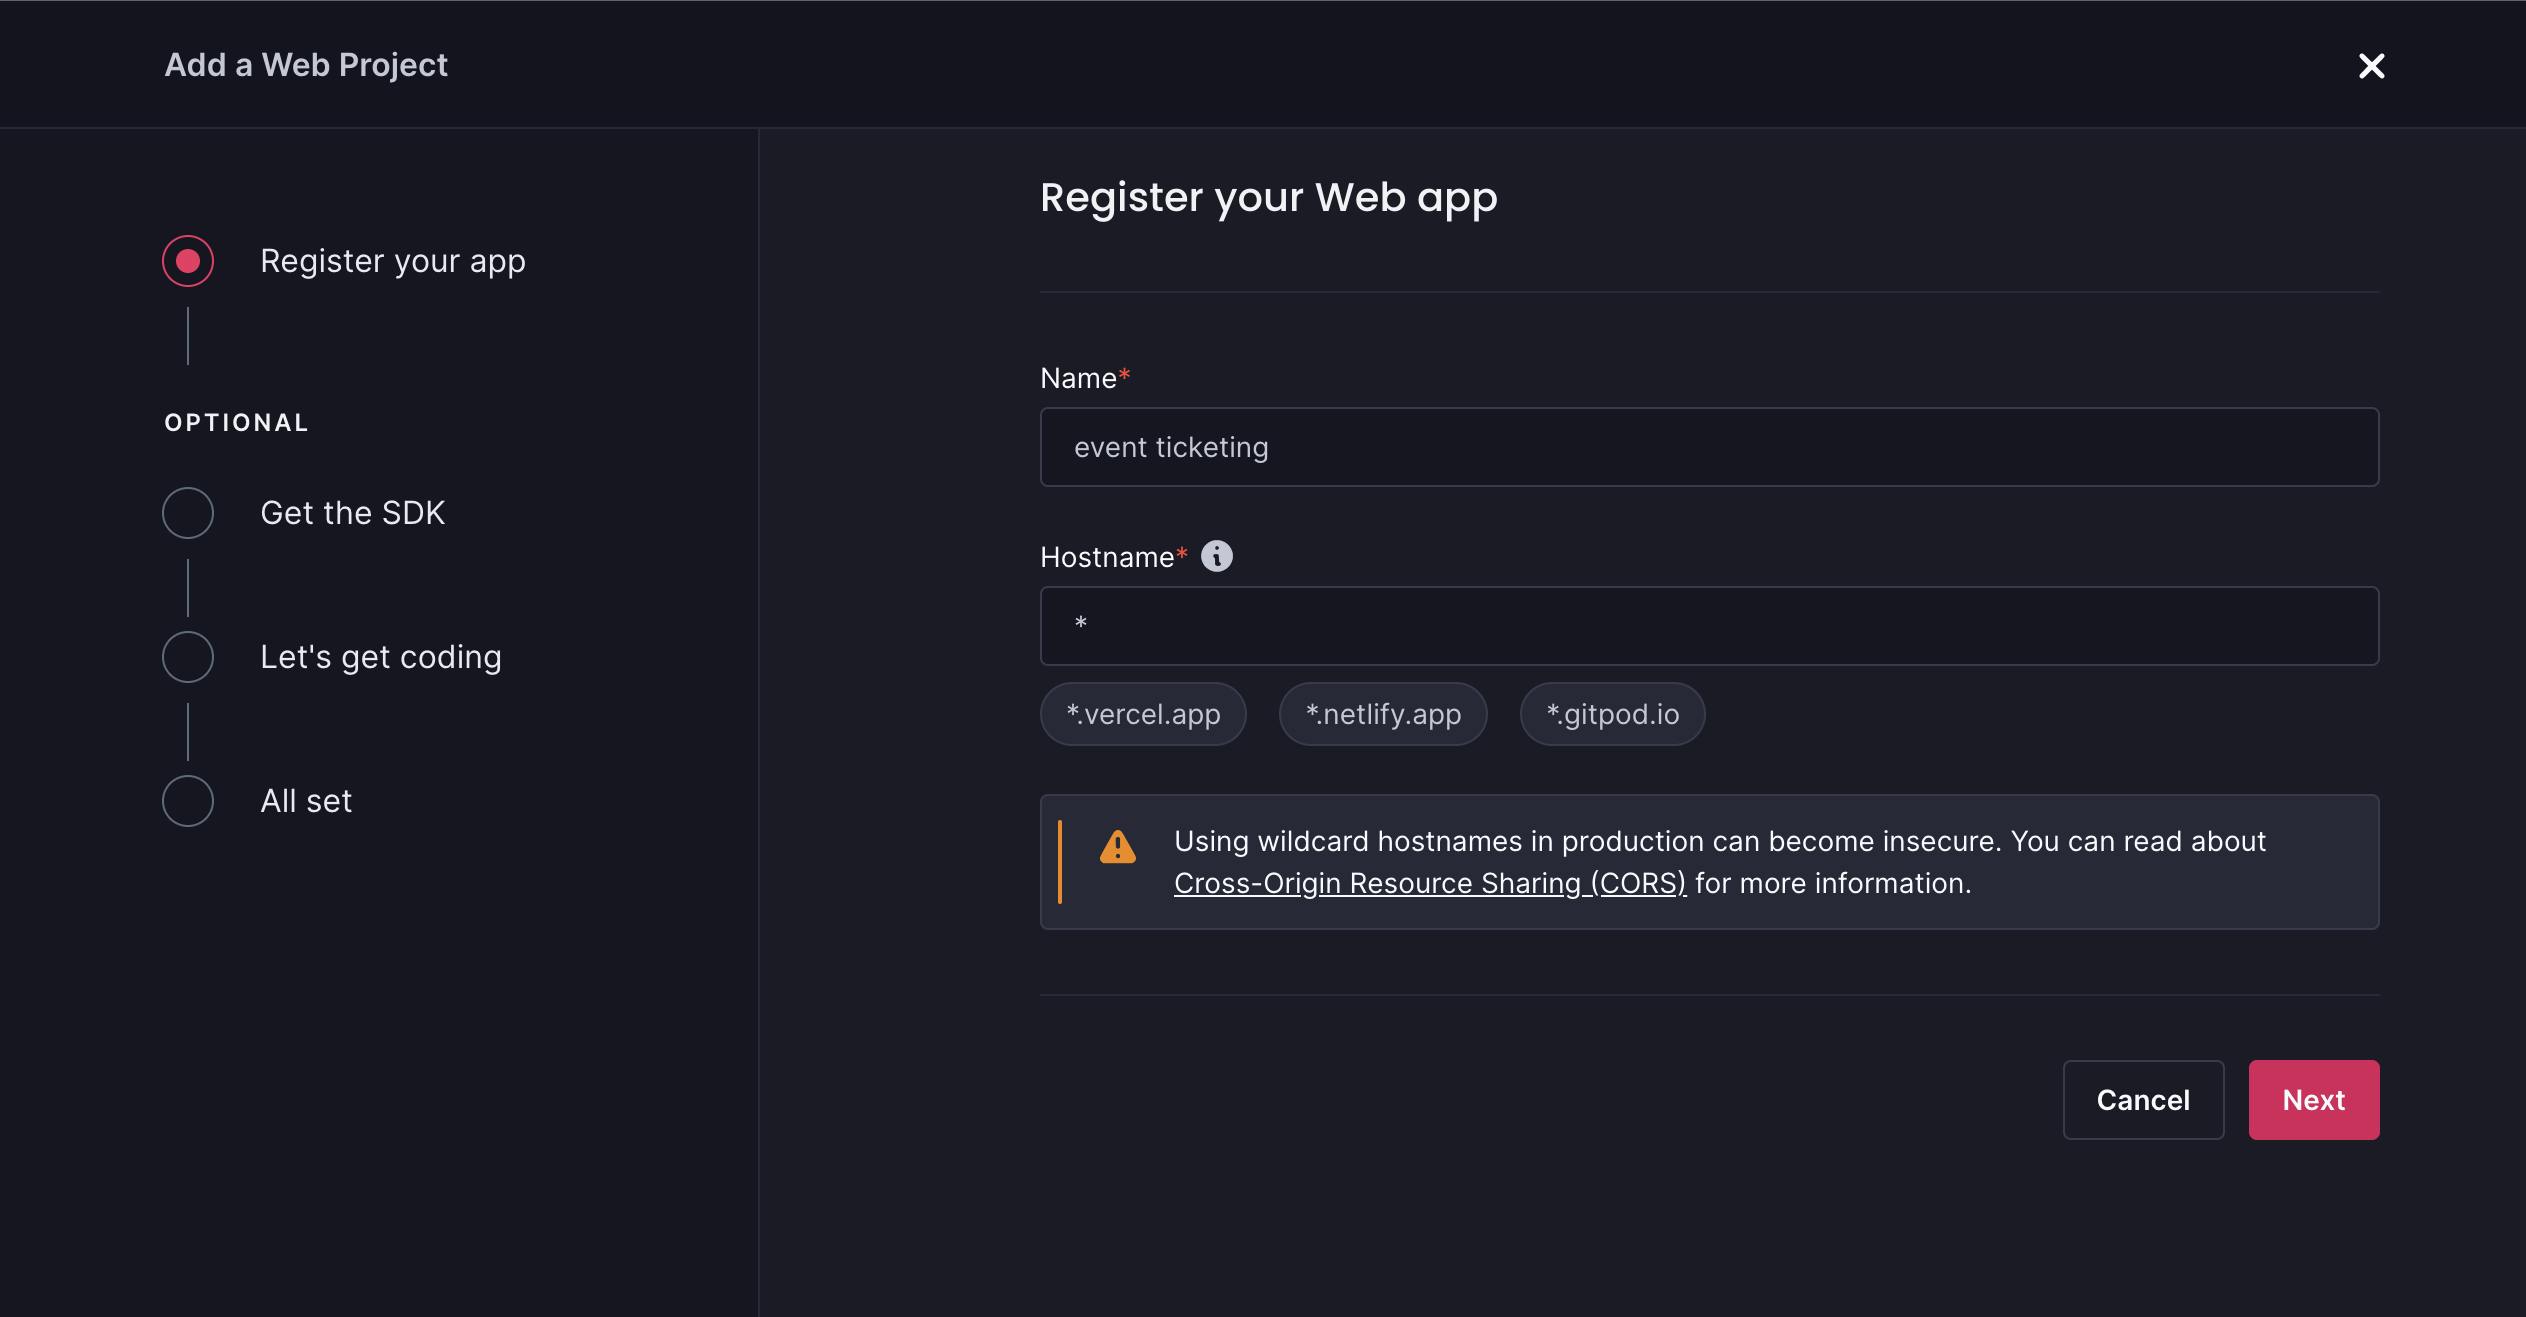
Since we are building a Next.js app with Appwrite Cloud, select Web App from the SDK Platform menu and register a new app under the project.
From the image below, I provided a name for the application and used an asterisk as the hostname. After deploying the application on Vercel, you can change the hostname to the URL provided by Vercel.
Install the Appwrite Node.js SDK into your Next.js project as done below.
npm install appwrite
Create a .env.local and appwrite.js file at the root of your project.
touch appwrite.js .env.local
Copy the code below into the appwrite.js file.
import { Client, Account, Databases, Storage } from "appwrite";
const client = new Client();

client
    .setEndpoint("https://cloud.appwrite.io/v1")
    .setProject(process.env.NEXT_PUBLIC_PROJECT_ID);

export const account = new Account(client);

export const db = new Databases(client);

export const storage = new Storage(client);
The code snippet above enables us to access and interact with the authentication, database, and file storage features provided by Appwrite.
Copy the code below into the .env.local file.
NEXT_PUBLIC_PROJECT_ID=<your_project_id>
NEXT_PUBLIC_DB_ID=<your_database_id>
NEXT_PUBLIC_EVENTS_COLLECTION_ID=<your_events_collection_id>
NEXT_PUBLIC_BUCKET_ID=<your_file_storage_bucket_id>
The code snippet above contains environment variables containing all the private keys needed for interacting with Appwrite Cloud.
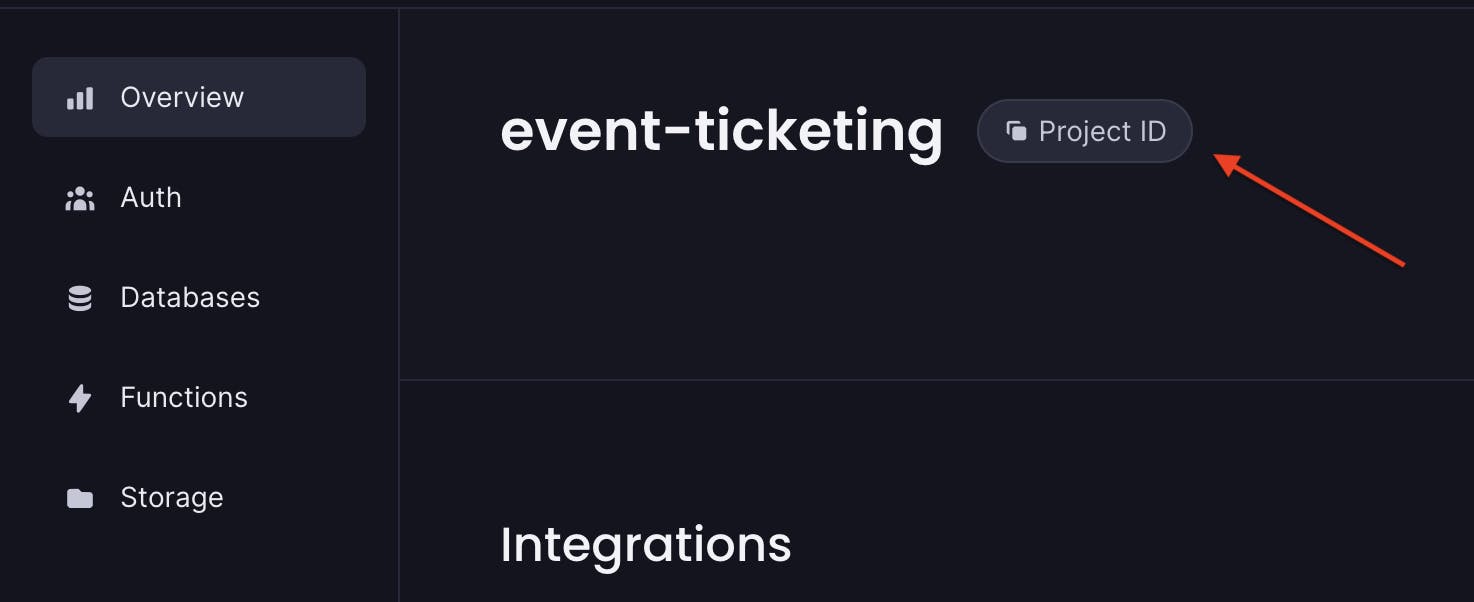
On your project dashboard, click the Project ID button to copy your project's id and paste it into the .env.local variable.
Setting up Authentication with Appwrite Cloud
Since you are using the Email and Password authentication method, you don't need to add any configurations on Appwrite Cloud before using the service because it has been configured by default.
However, let's add an extra layer of security to our project by updating the default Session length.
Select Auth from the sidebar menu and switch to the Security tab.

Scroll down to the Session Length section and change it from 365 days to 1 hour. Users will need to be re-authenticated after an hour of using the application, and, in case a user doesn't log out of our application, they are logged out automatically after an hour.
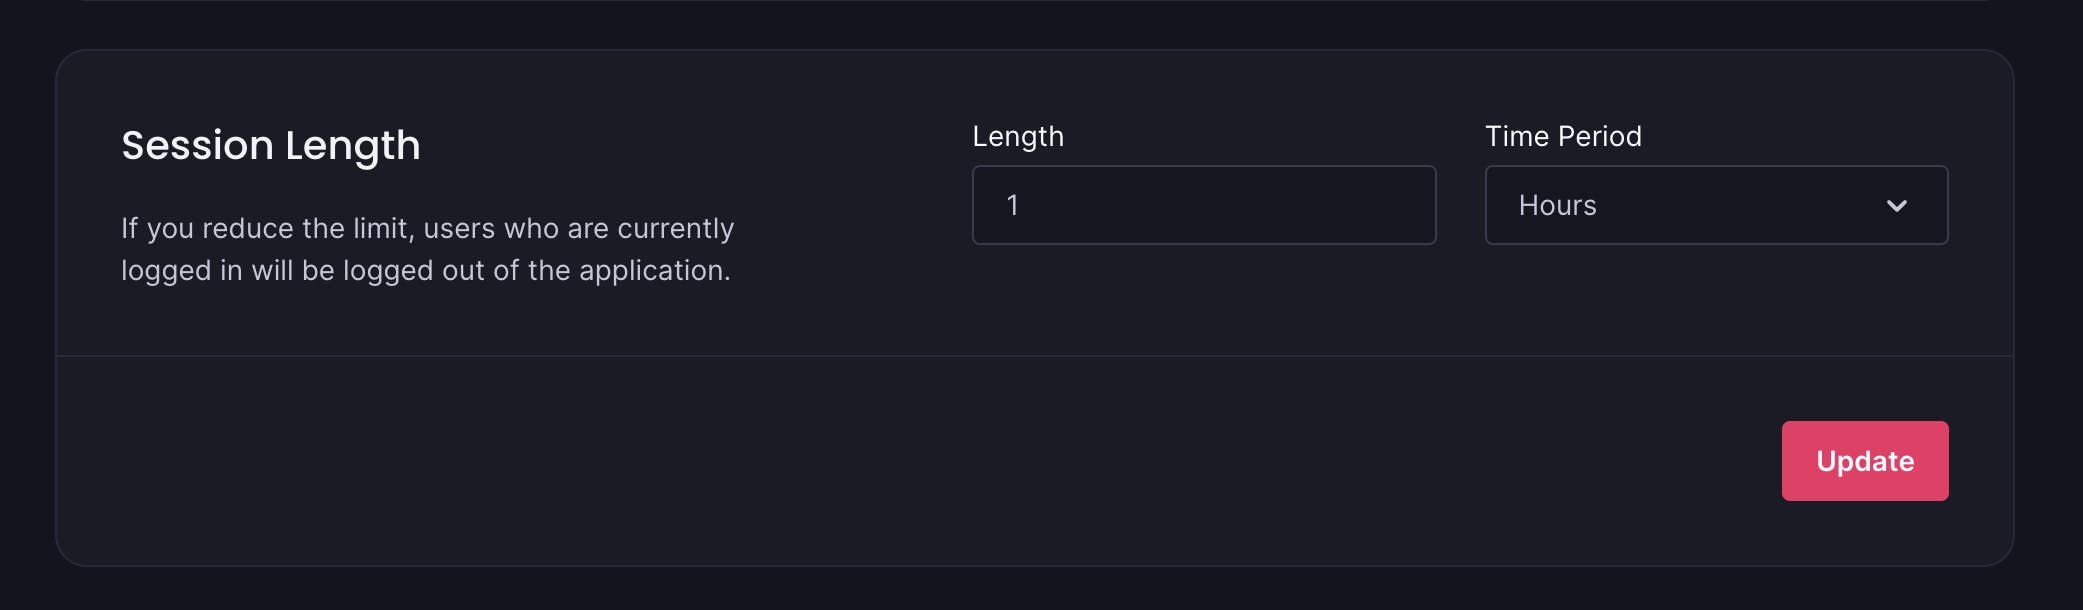
Click Update to add the new setting, and you're ready to go.🚀
Setting up the Appwrite Database
Here, you'll learn how to set up the database on Appwrite Cloud.
Select Database from the sidebar menu to create a new database.
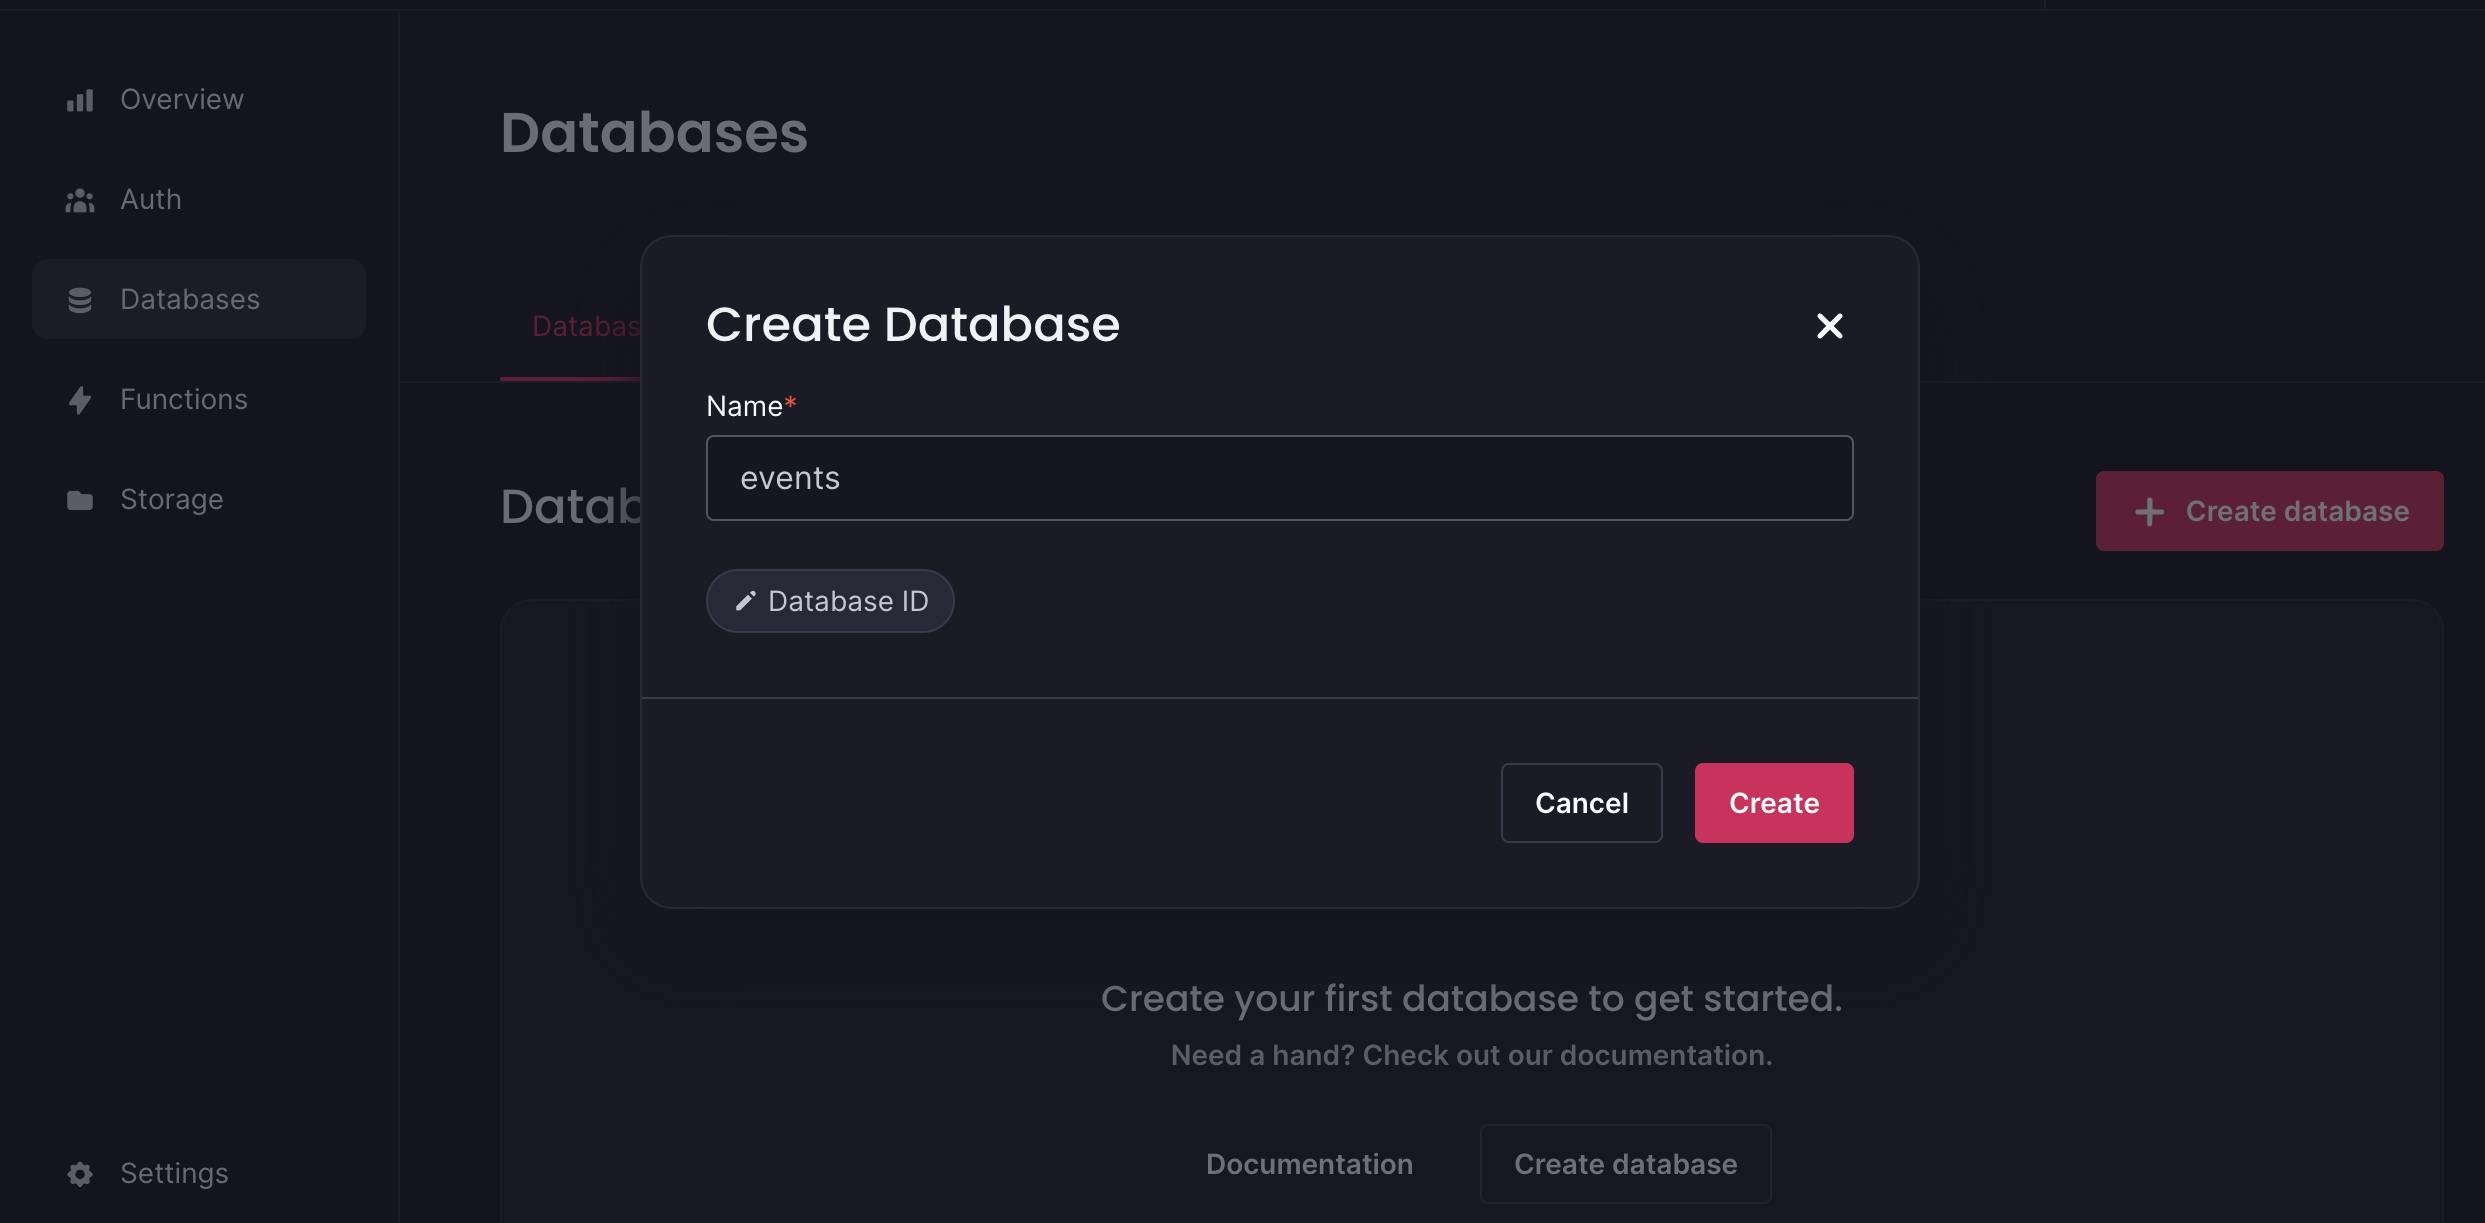
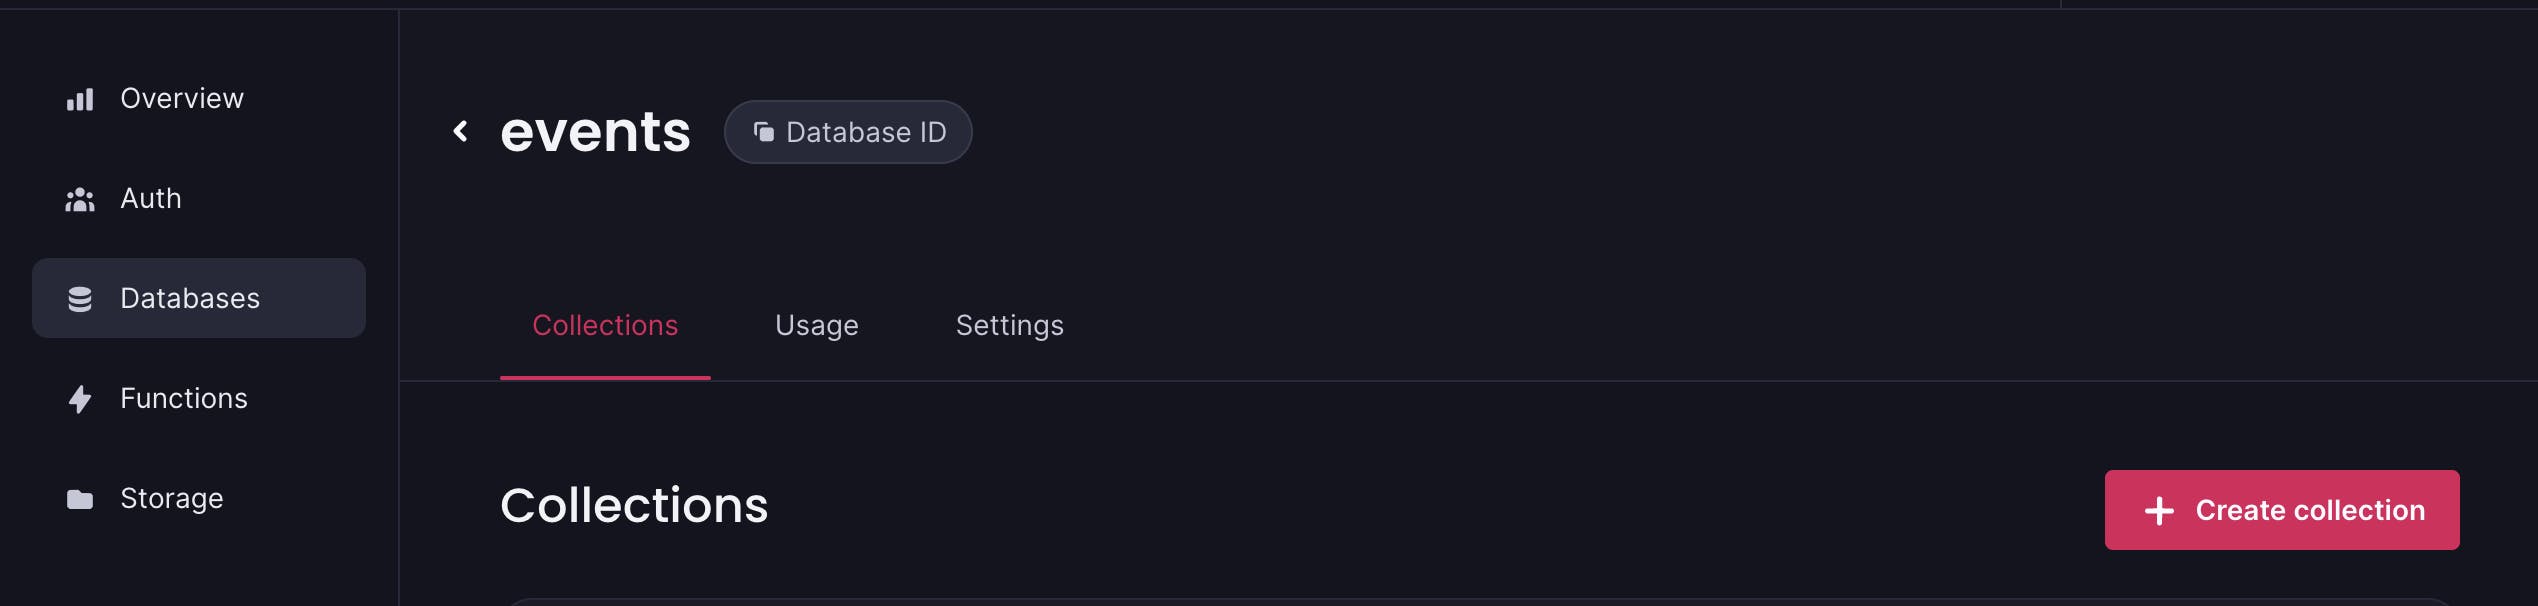
Copy the database ID and paste it into the .env.local file, then create a new collection called events.
A database collection contains documents, that is, items with the same attributes or column properties. A database collection is similar to a table in relational databases.
Setting up file storage with Appwrite Cloud Storage
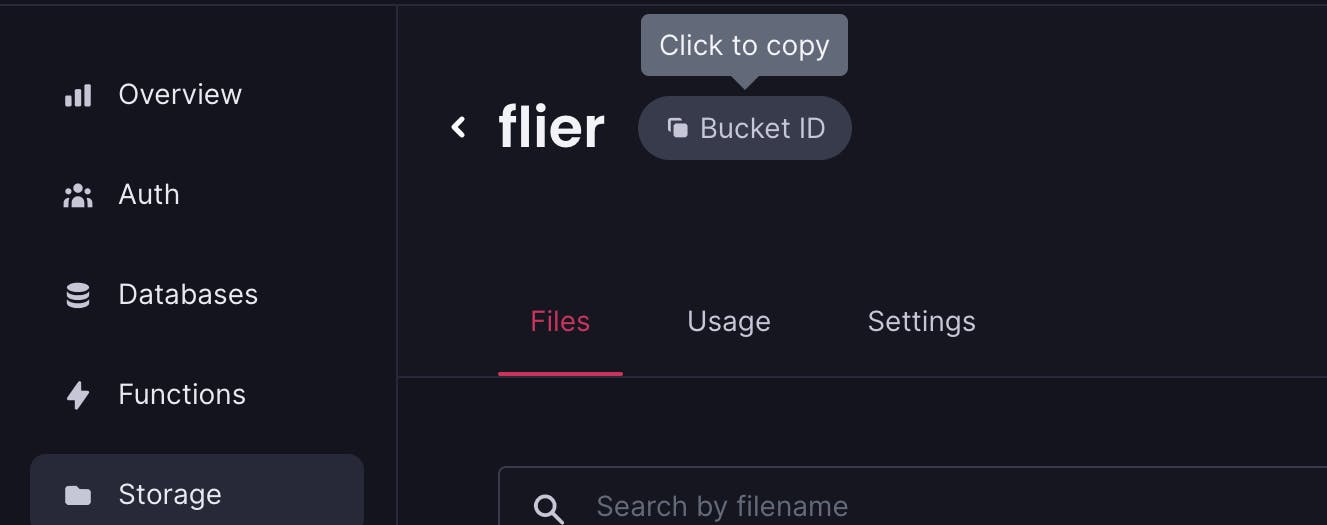
Select Storage from the sidebar menu and create a new bucket for the event fliers. Users will be able to upload their event fliers when creating an event.
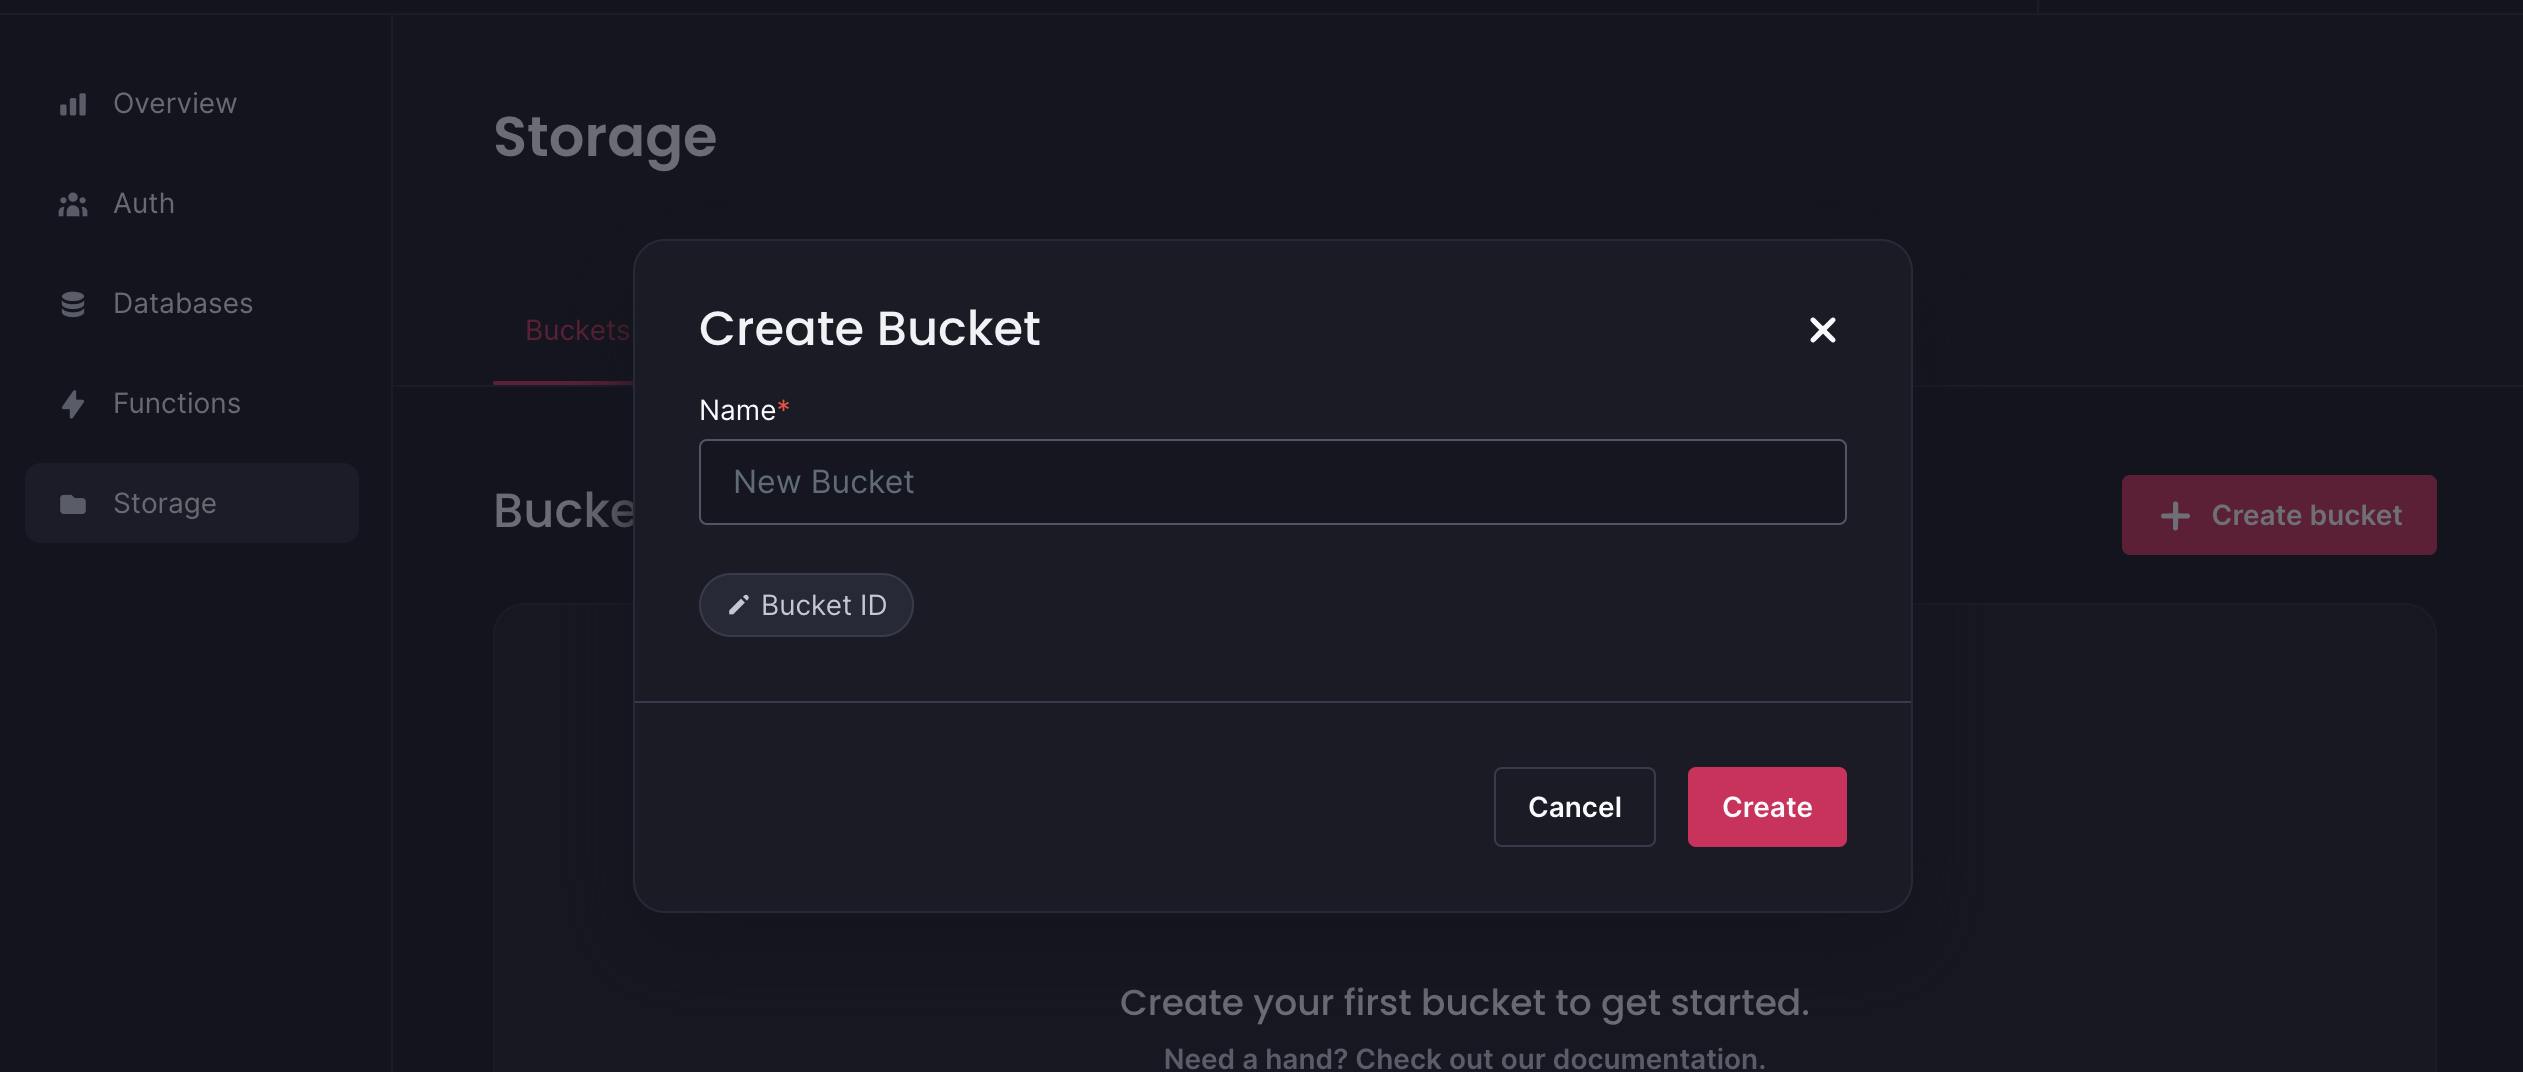
Copy the bucket ID and paste it into the .env.local file.
Congratulations 🎉, you've set up the required backend features. Next, I will walk you through how to communicate with Appwrite by building the event ticketing system.
Authenticating users with Appwrite Cloud
In this section, I'll walk you through the authentication aspect of the event ticketing system.
You can create a utils folder containing the functions and import them into the required components.
mkdir utils
cd utils
touch functions.js
Add the following imports into the file to enable us to interact with the backend features. We'll make use of them in the upcoming sections.
import { account, db, storage } from "./appwrite";
import { ID, Query } from "appwrite";
Signing up new users
This function is executed on the SignUp page. It accepts the user's name, email, and password and creates an account with the credentials.
export const signUp = async (name, email, password, router) => {
    try {
        await account.create(ID.unique(), email, password, name);
        successMessage("Account created! 🎉");
        router.push("/login");
    } catch (err) {
        errorMessage("Check your network / User already exists ❌");
        router.push("/login");
    }
};
The code snippet above accepts the useRouter hook and the user's credentials then create an account for the user. The account.create() method is the keyword provided by Appwrite to handle the account creation process.
If successful, the user is notified and redirected to the login page; otherwise displays an error message.
Signing in existing users
This function allows existing users to access the application. It accepts the user's email and password and returns a user object containing all the user's information.
export const logIn = async (email, password, router) => {
    try {
        await account.createEmailSession(email, password);
        successMessage(`Welcome back 🎉`);
        router.push("/dashboard");
    } catch (err) {
        console.error(err);
        errorMessage("Invalid credentials ❌");
    }
};
The code snippet above validates the user's credentials and creates an active session for the user. If the process is successful, it redirects the user to the dashboard page; otherwise returns an error.
Logging users out
Appwrite also provides an account.deleteSession() method that enables users to log out of an ongoing session.
export const logOut = async (router) => {
    try {
        await account.deleteSession("current");
        router.push("/");
        successMessage("See ya later 🎉");
    } catch (err) {
        console.error(err);
        errorMessage("Encountered an error 😪");
    }
};
The code snippet above deletes the user's current session and redirects the user to the application's home page.
Protecting pages from unauthenticated users
To do this, you can store the user's information object to a state after logging in or use Appwrite's account.get() method.
Using the account.get() method:
export const checkAuthStatus = async (setUser, setLoading, router) => {
    try {
        const request = await account.get();
        setUser(request);
        setLoading(false);
    } catch (err) {
        router.push("/");
    }
};
The code snippet above gets all the information related to the currently signed-in users. It checks if the user is active and returns the object containing all the user's details.
You can execute the function on page load for routes containing protected data, such as the Dashboard, View Event Details, and Create Event routes.
Communicating with Appwrite Cloud: Interacting with the database and storage
In this section, you'll learn how to interact with the Appwrite Database by creating, updating, and deleting events and also uploading images to File Storage.
Creating new events
After authenticating the users, they will be able to create new events via the New link on the dashboard page. Therefore, create a route containing a form that accepts the following details, as shown below.

export const createTicket = async (
    id,
    title,
    date,
    time,
    venue,
    description,
    note,
    flier,
    router
) => {
    console.log({ id, title, date, time, venue, description, note, flier });
};
The function above accepts all the data related to each event. The id attribute in the code snippet above refers to the user's id, not the event's id. Adding the user's id to each event data enables us to query events created by a particular user.
Also, since the form field in the image above accepts the event's flier via image upload, you need to save the image to Cloud Storage and attach it to the event's document on the database.
How do you do this? 🤷🏼♂️
First, add the event's attribute to the event document on Appwrite Cloud. Select the events collection and click on the Attributes tab.
Add all the event's attributes as shown below.

Next, click on the Settings tab and update the permissions.
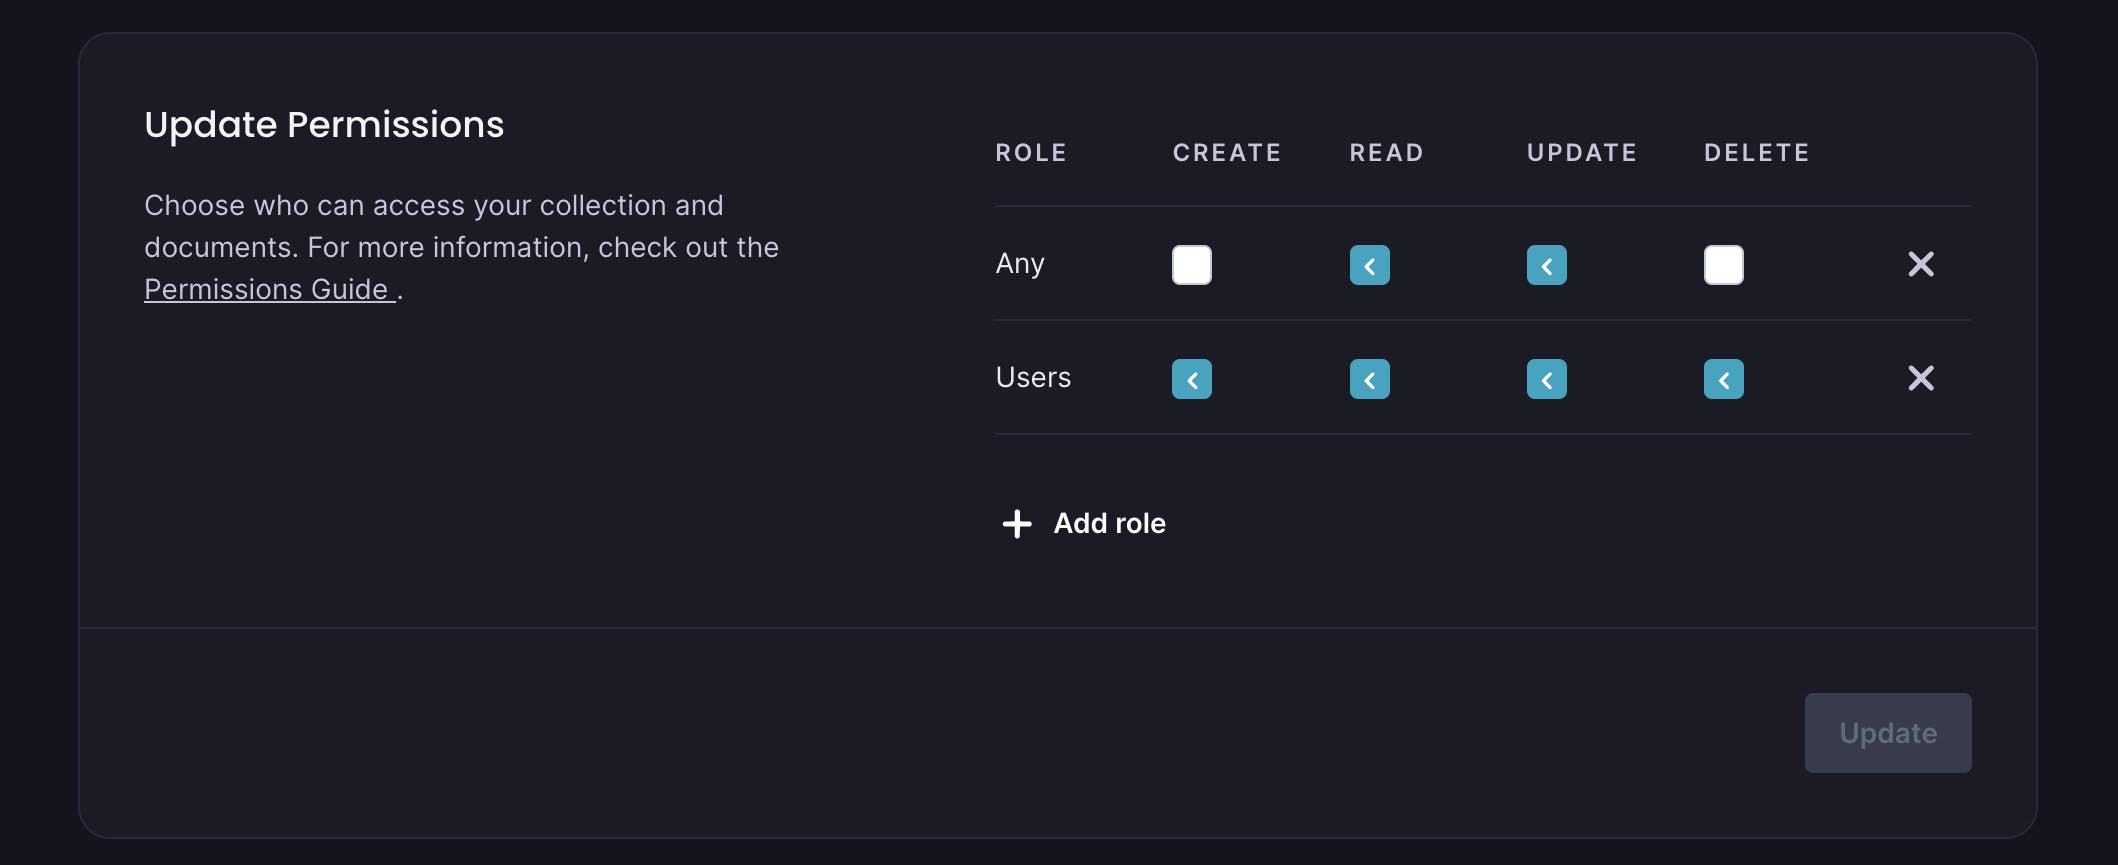
The image above shows that anyone can read and update the event document, but only authenticated users can create and delete an event because an event's attendee does not need to be a user before registering for an event.
Therefore this enables us to add each attendee's information to the attendees array and also allows them to read the details about the event.
Finally, update the Permissions for the bucket storage.
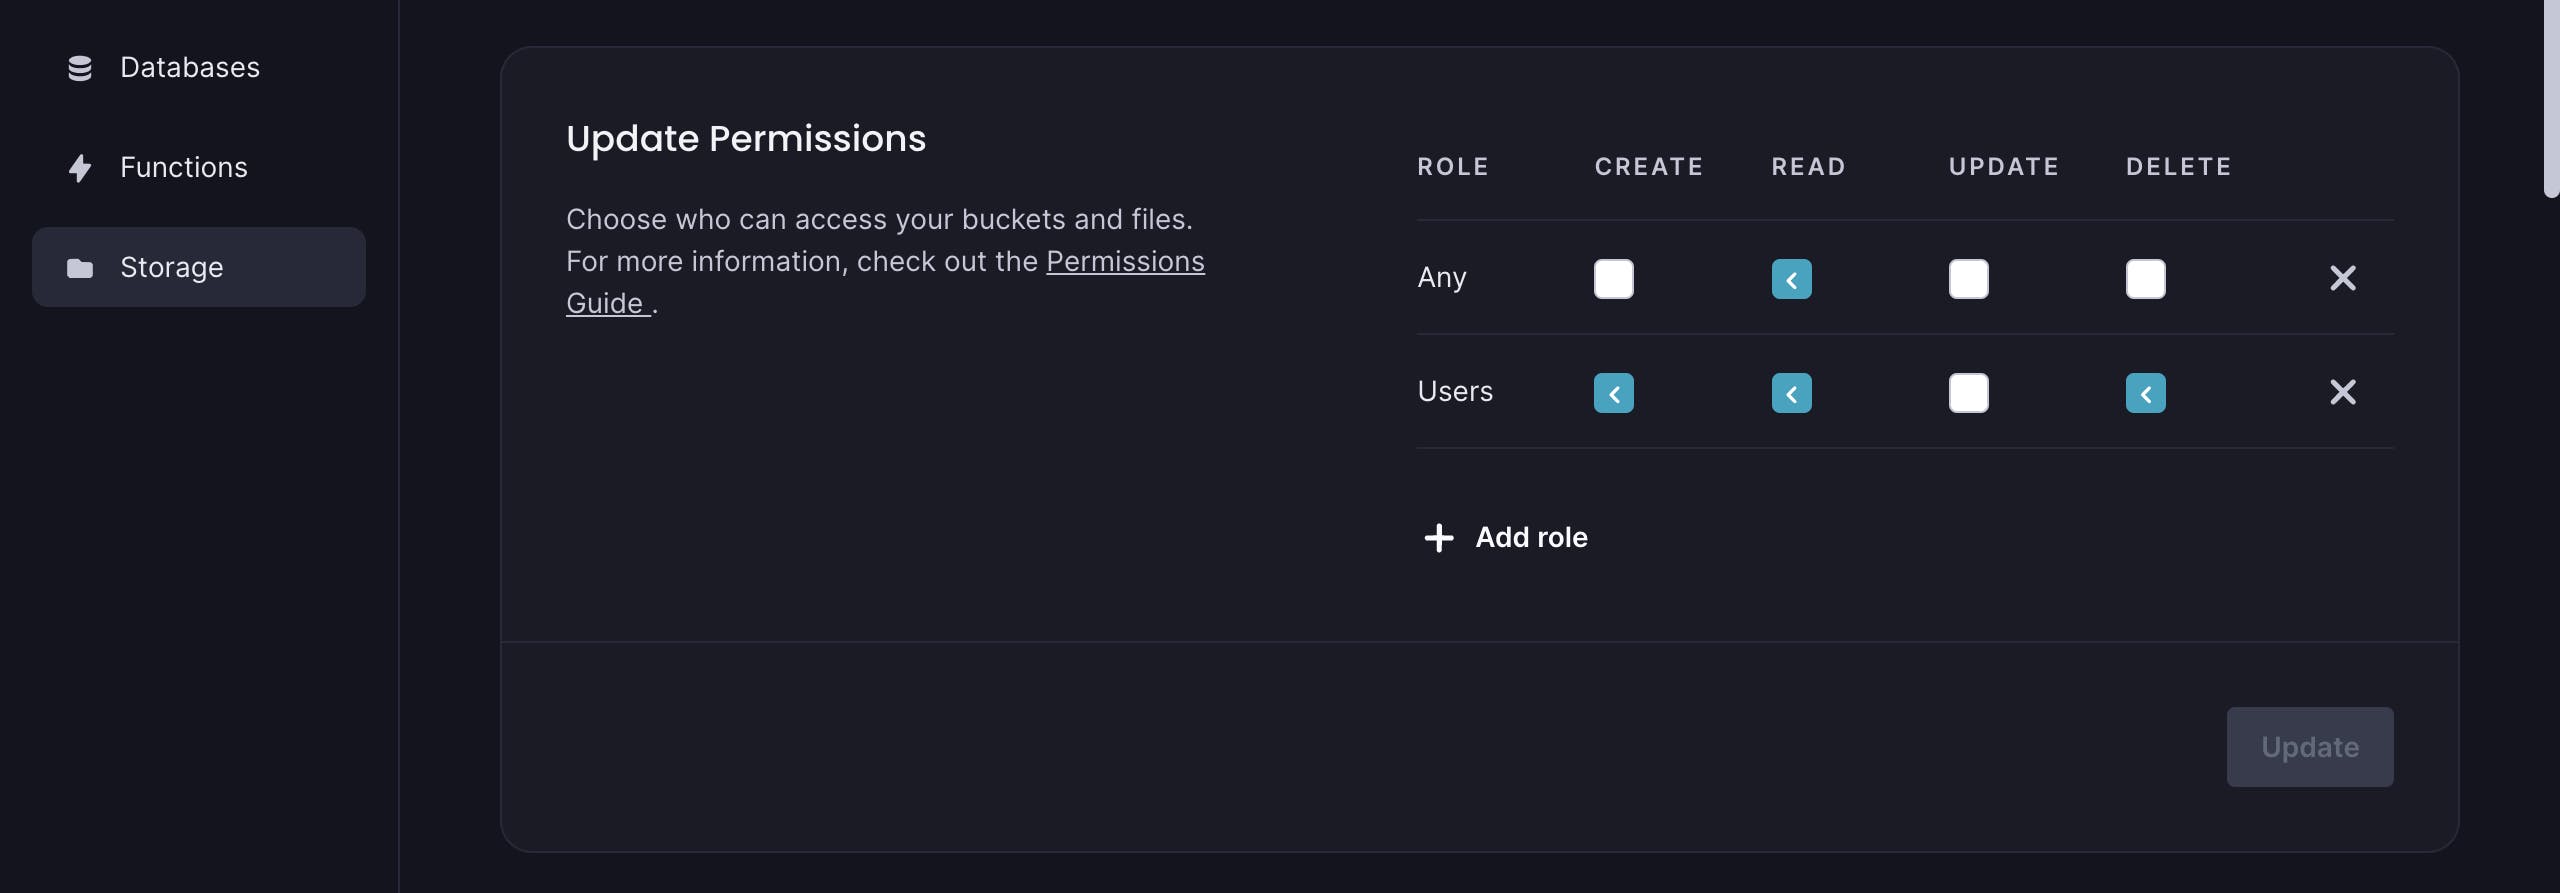
From the image above, anyone can view the flier for each event, and only users can create, read, and delete the fliers from the bucket.
The Code
export const createEvent = async (
    id,
    title,
    date,
    time,
    venue,
    description,
    note,
    flier,
    router
) => {
    const createDocument = async (flier_url = "https://google.com") => {
        try {
            const response = await db.createDocument(
                process.env.NEXT_PUBLIC_DB_ID,
                process.env.NEXT_PUBLIC_EVENTS_COLLECTION_ID,
                ID.unique(),
                {
                    user_id: id,
                    title,
                    date,
                    time,
                    venue,
                    description,
                    note,
                    slug: createSlug(title),
                    attendees: [],
                    disableRegistration: false,
                    flier_url,
                }
            );
            successMessage("Ticket created 🎉");
            router.push("/dashboard");
        } catch (error) {
            console.error("DB ERROR >>", error);
            errorMessage("Encountered an error ❌");
        }
    };

    if (flier !== null) {
        try {
            //👉🏻 upload image and ticket details
        }
    } else {
        await createDocument();
    }
};
From the code snippet above,
The nested function,
createDocumentaccepts all the event's attributes and creates a new document on the Appwrite Cloud. Since uploading a flier is optional, theflier_urlattribute has a default URL value.I added three more properties - (
slug, attendees, disableRegistration) to the event document.The
attendeesarray will contain the list of people who registered for the event.The
slugenables us to generate a human-readable URL for each event.The
disableRegistrationattribute enables us to differentiate events accepting registration from others.Lastly, since users can either choose to upload an event flier or not, you need to ensure that both cases are successful. Hence, the
createDocument()function is executed when a user does not upload any image. In this case, it will use the default flier URL.
Before we proceed, create the createSlug function. It accepts the event title and creates a human-readable URL string format.
export const createSlug = (sentence) => {
    let slug = sentence.toLowerCase().trim();
    slug = slug.replace(/[^a-z0-9]+/g, "-");
    slug = slug.replace(/^-+|-+$/g, "");
    return slug;
};
Finally, update the conditional statement within the createEvent function.
if (flier !== null) {
    try {
        const response = await storage.createFile(
            process.env.NEXT_PUBLIC_BUCKET_ID,
            ID.unique(),
            flier
        );
        const flier_url = `https://cloud.appwrite.io/v1/storage/buckets/${process.env.NEXT_PUBLIC_BUCKET_ID}/files/${response.$id}/view?project=${process.env.NEXT_PUBLIC_PROJECT_ID}&mode=admin`;

        //👇🏻 calls createDocument function
        await createDocument(flier_url);
    } catch (error) {
        console.error("STORAGE ERR >>>", error);
        errorMessage("Encountered an error saving the flier❌");
    }
} else {
    await createDocument();
}
The code snippet above checks if the user uploaded a flier for the event. If yes, the function adds the file to the bucket on the Cloud Storage, then passes the file's URL on the Cloud into the createDocument function. This ensures that each document has a link to its flier.
Getting all the events created by a user
On the Dashboard page, you need to display all the events created by the current user. To do this, query the events collection and return only events whose user_id attribute matches the current user's ID.
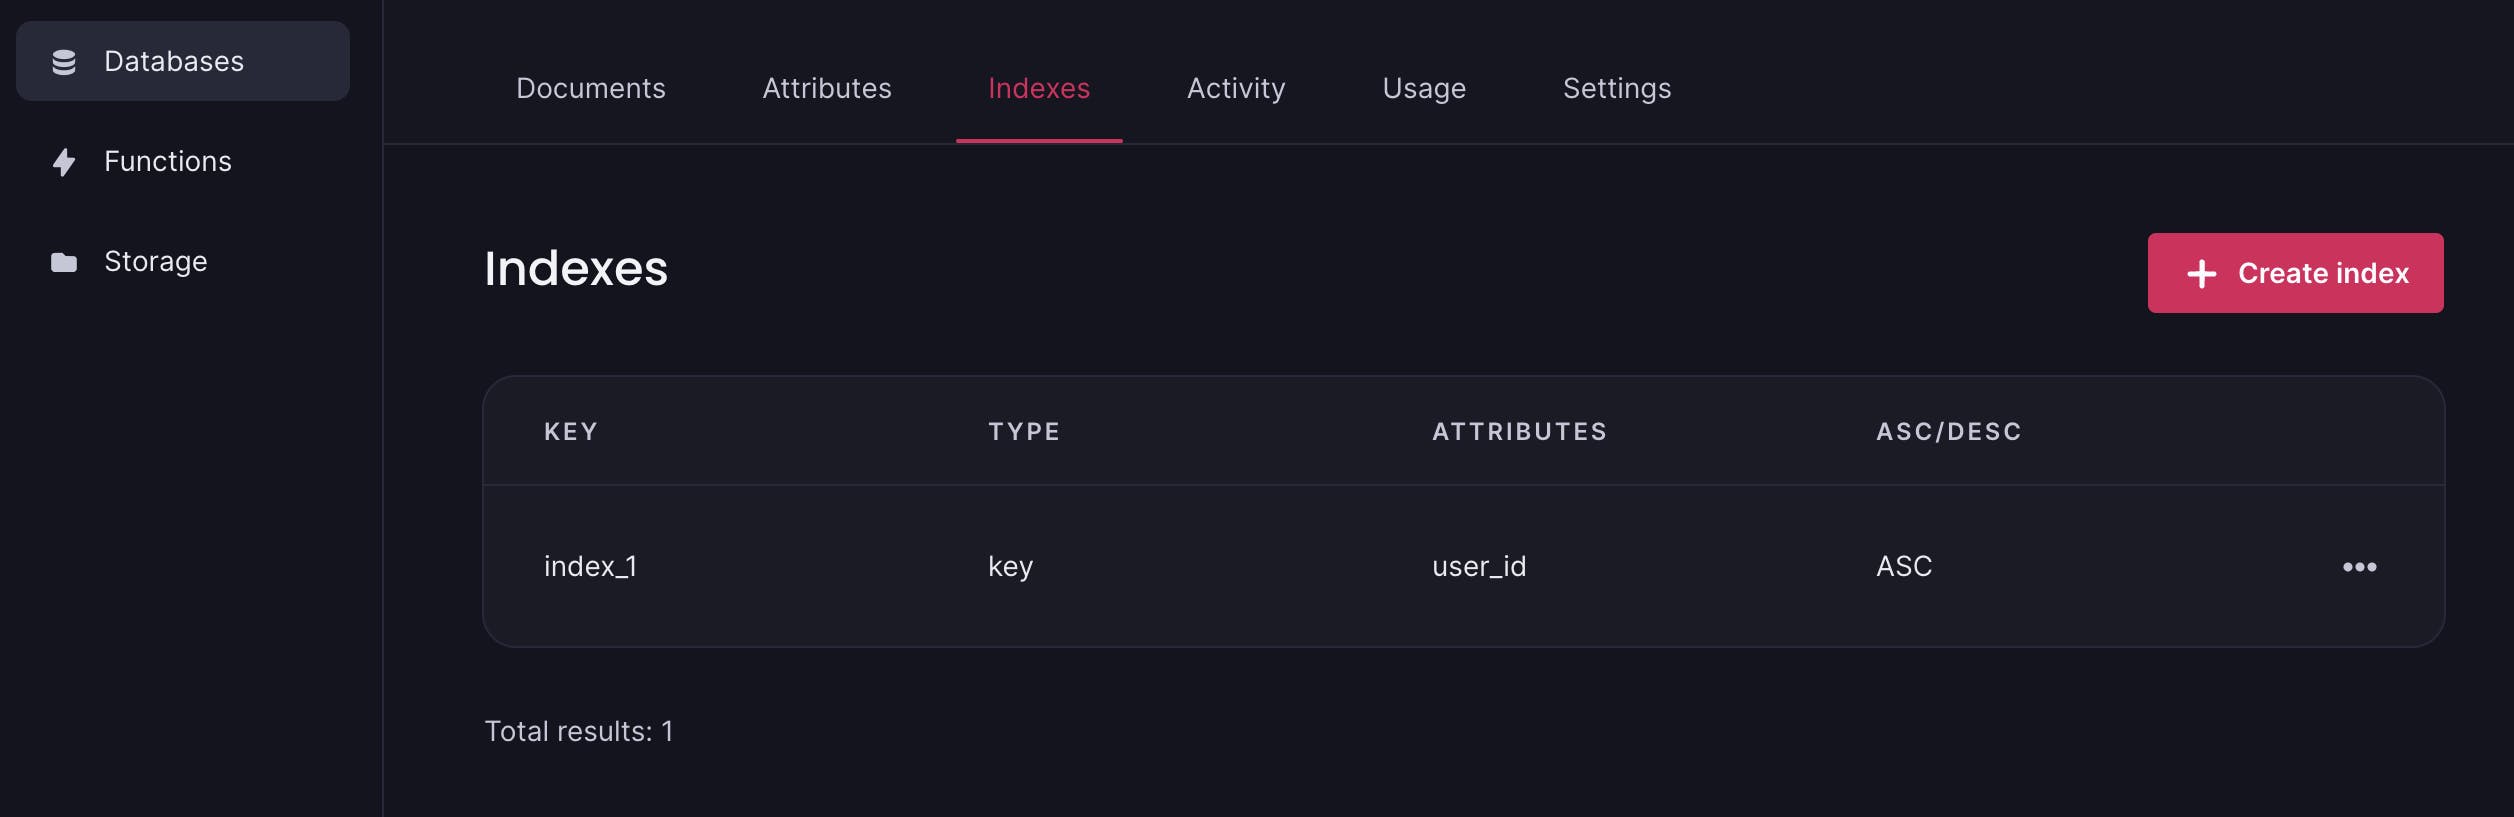
Select the Indexes tab under the Database section and create a new index using the user_id attribute.
Now, we can make a function call to request the tickets created by a particular user, as shown below.
const getTickets = async (id, setEvents, setLoading) => {
    try {
        const request = await db.listDocuments(
            process.env.NEXT_PUBLIC_DB_ID,
            process.env.NEXT_PUBLIC_EVENTS_COLLECTION_ID,
            [Query.equal("user_id", id)]
        );
        setEvents(request.documents);
        setLoading(false);
    } catch (err) {
        console.error(err);
    }
};
The code snippet above queries the list of events on the Appwrite Cloud and returns only events whose id matches the current user. The events are then displayed on the Dashboard page.
Deleting events
Allowing users to delete an event is one of the key features of the application. The function below shows how you can achieve that:
export const deleteTicket = async (id) => {
    try {
        //👇🏻 get's the event's document
        const getDoc = await db.getDocument(
            process.env.NEXT_PUBLIC_DB_ID,
            process.env.NEXT_PUBLIC_EVENTS_COLLECTION_ID,
            id
        );
        if (getDoc.flier_url === "https://google.com") {
            //👇🏻 deletes event's document
            await db.deleteDocument(
                process.env.NEXT_PUBLIC_DB_ID,
                process.env.NEXT_PUBLIC_EVENTS_COLLECTION_ID,
                id
            );
        } else {
            //👇🏻 extracts image ID from flier URL
            const fileID = extractIdFromUrl(getDoc.flier_url);
            //👇🏻 deletes event's image from the bucket storage
            await storage.deleteFile(process.env.NEXT_PUBLIC_BUCKET_ID, fileID);
            //👇🏻 deletes event's document
            await db.deleteDocument(
                process.env.NEXT_PUBLIC_DB_ID,
                process.env.NEXT_PUBLIC_EVENTS_COLLECTION_ID,
                id
            );
        }
        successMessage("Ticket deleted! 🎉");
    } catch (err) {
        console.error(err); // Failure
        errorMessage("Action declined ❌");
    }
};
From the code snippet above,
The function gets the document to be deleted via its ID.
Then checks if the
flier_urlis set to the default value, meaning if the event does not have a flier image. If it doesn't have a flier, it deletes the entire document.If the event document has a
flier_urldifferent from the default value"https://google.com". It extracts its flier from Cloud Storage and deletes both the event document and its image - the event's flier.
The extractIdFromUrl function extracts the flier's ID from the flier's URL attribute to enable us to delete both the event's image and document from Appwrite Cloud.
const extractIdFromUrl = (url) => {
    const regex = /files\/([^/]+)\//;
    const match = url.match(regex);
    return match ? match[1] : null;
};
Disabling new registrations
The application is incomplete if a user cannot disable the registration for an event when its deadline has passed or if they have enough guests (attendees).
export const disableRegistration = async (documentId) => {
    try {
        await db.updateDocument(
            process.env.NEXT_PUBLIC_DB_ID,
            process.env.NEXT_PUBLIC_EVENTS_COLLECTION_ID,
            documentId,
            {
                disableRegistration: true,
            }
        );
        successMessage("New registration disabled! 🎉");
    } catch (err) {
        console.error(err); // Failure
        errorMessage("Encountered an error 😪");
    }
};
The code snippet above accepts the event's id and updates the event document by setting the disableRegistration property to true.
When users receive an event invite with its disableRegistration attribute set to true, the page does not display a registration form; instead, it shows that the registration for that event is closed.

Handling attendees registration
Before you add an attendee to an event, you have to do three things:
Fetch the event document via its ID attached to the invite link.
Validate the attendee's email with the existing array of attendees at the event.
If the email does not exist on the list, add the user to the list. Otherwise, return an error showing that the user has already registered for the event.
export const registerAttendee = async (name, email, documentId) => {
    //👇🏻 generates random string as ID
    const attendeeID = Math.random().toString(36).substring(2, 24);

    try {
        const doc = await db.getDocument(
            process.env.NEXT_PUBLIC_DB_ID,
            process.env.NEXT_PUBLIC_EVENTS_COLLECTION_ID,
            documentId
        );
        const JSONattendees = doc.attendees;
        const attendees = JSONattendees.map(parseJSON);
        const result = attendees.filter((item) => item.email === email);

        if (result.length === 0) {
            await db.updateDocument(
                process.env.NEXT_PUBLIC_DB_ID,
                process.env.NEXT_PUBLIC_EVENTS_COLLECTION_ID,
                documentId,
                {
                    attendees: [
                        ...doc.attendees,
                        JSON.stringify({ name, email, id: attendeeID }),
                    ],
                }
            );
            // 👉🏻 sendEventTicketViaEmail()
        } else {
            errorMessage("User already registered ❌");
        }
    } catch (err) {
        console.error(err); // Failure
        errorMessage("Encountered an error!");
    }
};

//👇🏻 converts JSON attendee string to an array of JavaScript objects
export const parseJSON = (jsonString) => {
    try {
        return JSON.parse(jsonString);
    } catch (error) {
        console.error("Error parsing JSON:", error);
        return null;
    }
};
The code snippet above fetches an event via its ID, gets its attendees' list, and converts it from a JSON string to JavaScript. Then checks whether the user hasn't registered for the event before adding the user to the attendees' list.
Each attendee is assigned an ID. The attendee's id, name, and email are added to the attendees attribute of the event as a JSON string.
On the event details page, you can show the attendees' list for the event and an input field that search for attendees via their id.

Creating and sending event tickets to attendees
After an attendee has successfully registered for an event, you need to send an email containing the event details and their passcode to the event.
To do this, you can use a JavaScript library that supports email notifications, such as EmailJS, Sendgrid, etc.
How to send emails via EmailJS
Here, I'll guide you through how you can add EmailJS to the application.
Install EmailJS to the Next.js application by running the code below:
npm install @emailjs/browser
Create an EmailJS account and add an email service provider to your account.
Add an email template as done in the image below. The words in curly brackets represent variables that can hold dynamic data.
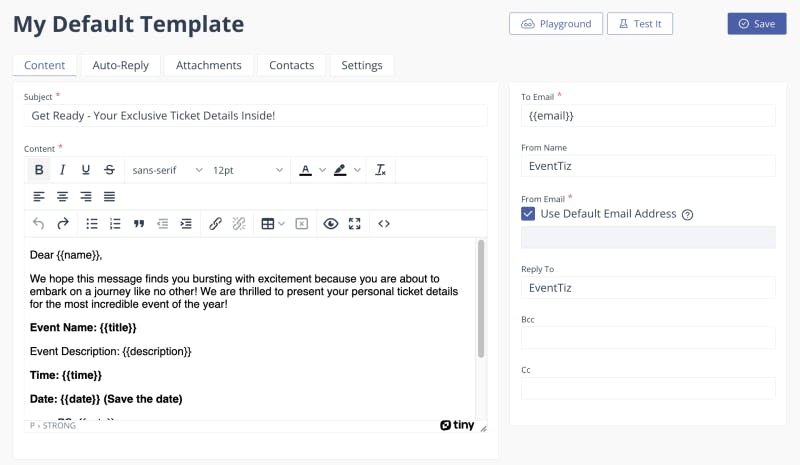
Dear {{name}},

We hope this message finds you bursting with excitement because you are about to embark on a journey like no other! We are thrilled to present your personal ticket details for the most incredible event of the year!

Event Name: {{title}}

Event Description: {{description}}

Time: {{time}}

Date: {{date}} (Save the date)

PS: {{note}}


Please keep your invitation code secret - {{passcode}}. This shows you're part of the attendees.

DOWNLOAD EVENT FLIER - {{flier_url}}
Congratulations! You can send the event tickets using the email template above.
Sending the event tickets to attendees with EmailJS
To send the event ticket to the newly registered attendee, update the if block within the registerAttendee function, as done below.
if (result.length === 0) {
            await db.updateDocument(
                process.env.NEXT_PUBLIC_DB_ID,
                process.env.NEXT_PUBLIC_EVENTS_COLLECTION_ID,
                documentId,
                {
                    attendees: [
                        ...doc.attendees,
                        JSON.stringify({ name, email, id: attendeeID }),
                    ],
                }
            );
            const flierURL =
                doc.flier_url !== "https://google.com"
                    ? doc.flier_url
                    : "No flier for this event";

            sendEmail(
                name,
                email,
                doc.title,
                doc.time,
                doc.date,
                doc.note,
                doc.description,
                attendeeID,
                flierURL,
                setSuccess,
                setLoading
            );
        } else {
            errorMessage("User already registered ❌");
        }
The code snippet checks if there is no existing user with the same email before adding the new user to the attendees' list. If there is no flier attached to the event, it takes note of that and passes all the event's information as parameters to the sendEmail function.
Create the sendEmail function to send the event details to the newly-registered attendee's email.
//👇🏻 send email via EmailJS
const sendEmail = (
    name,
    email,
    title,
    time,
    date,
    note,
    description,
    passcode,
    flier_url,
    setSuccess,
    setLoading
) => {
    emailjs
        .send(
            process.env.NEXT_PUBLIC_EMAIL_SERVICE_ID,
            process.env.NEXT_PUBLIC_EMAIL_TEMPLATE_ID,
            {
                name,
                email,
                title,
                time,
                date: formatDate(date),
                note,
                description,
                passcode,
                flier_url,
            },
            process.env.NEXT_PUBLIC_EMAIL_API_KEY
        )
        .then(
            (result) => {
                setLoading(false);
                setSuccess(true);
            },
            (error) => {
                errorMessage(error.text);
            }
        );
};
The sendEmail function accepts all the required parameters and sends the email using the EmailJS library.
Conclusion
Congratulations on making it thus far! You've learnt
what Appwrite is,
how to add Appwrite to a Next.js app,
how to work with Appwrite Cloud Authentication, Storage, and Database, and
how to build an event ticketing system.
I've built a live version of the application, check it out - https://eventtiz-appwrite.vercel.app. The source code is also available here
Appwrite is a great tool that provides almost everything you need to build a full-stack web application. If you want to create a full-stack web application without any backend programming experience, consider using Appwrite Cloud.
Thank you for reading! 🎉